With the Sapphire Custom Web Pack Orders platform, you can easily handle your orders, make updates to information, and communicate with vendors and suppliers.
The platform allows you to track the status of each order, from the moment it is placed to its fulfillment and delivery.
Furthermore, this platform facilitates seamless communication with your vendors and suppliers. You can easily send messages, and collaborate on orders and shipments. This streamlines the communication process and ensures that everyone involved in the supply chain is on the same page.
Here’s how to use the Sapphire Custom Web Pack Orders:
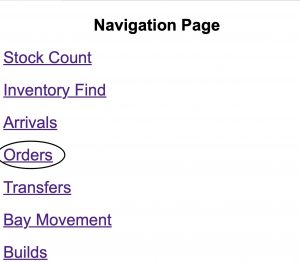
- From the Navigation page, Select “Orders”.
- Once the page is entered, a page with the following information will appear:
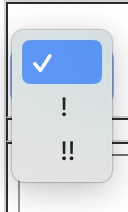
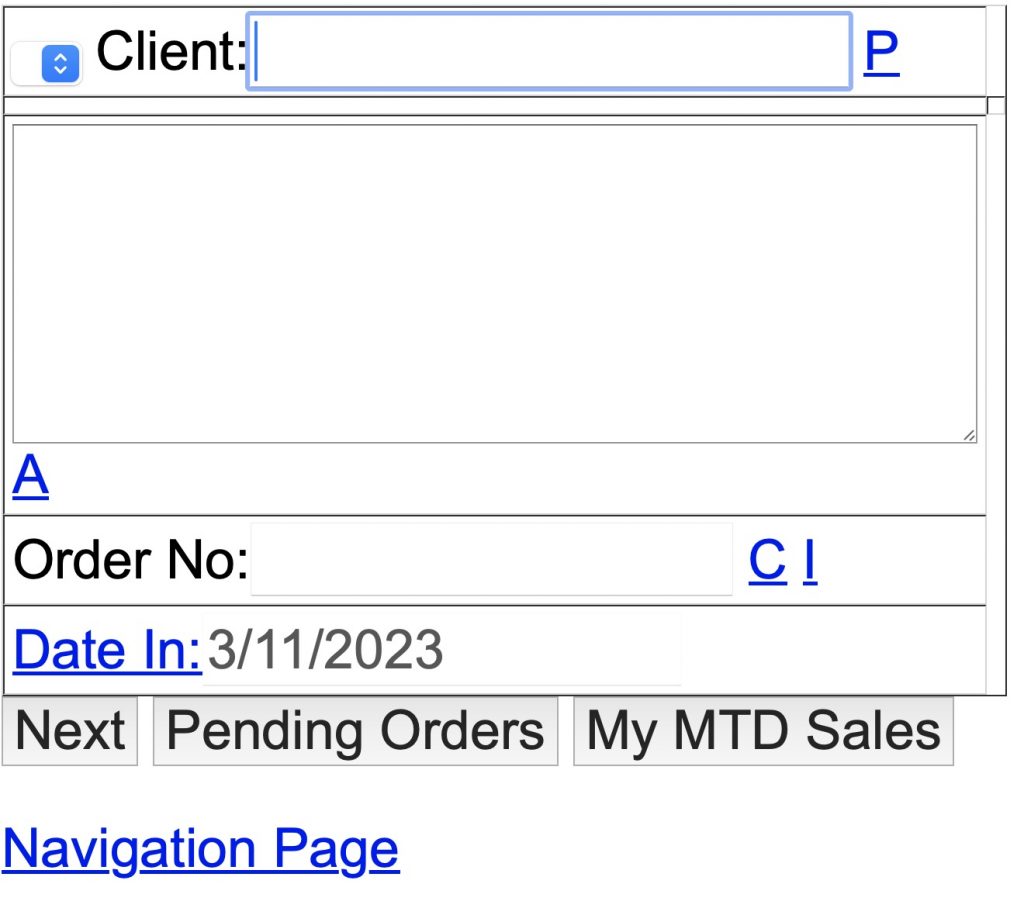
- Client Title Urgency (! or !!) – “!” for urgent, “!!” for extra urgent.
- Client – Client name.
- P – Phone number, if clicked it will dial to your Client using the SapphireOne integrated soft phone.
- A – Address book, if clicked opens it.
- Order No – Order number.
- C – Customer notes, if clicked you may create or add new and additional notes.
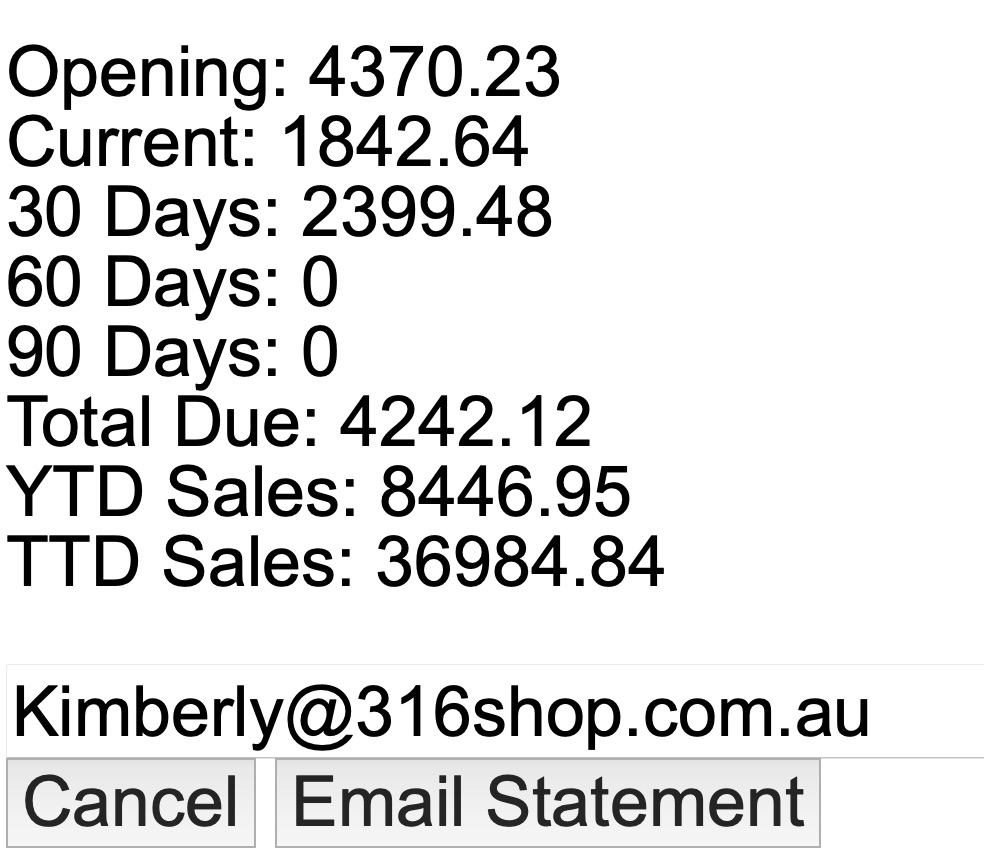
- I – Information, if clicked you will view current account balance and additional information regarding your client.
- Date – Order date.
- Next – Move onto the next stage.
- Pending Orders – Orders in progress.
- My MTD Sales – “Month-To-Date” sales, a measure of the total sales revenue a company.
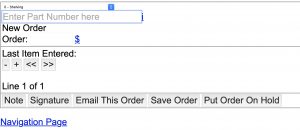
- Selecting Next will navigate you to the following page of the order, and be able to fill these details:
- Inventory Number – UPC/Bar Code identification number.
- Order Number – Client Order identification number.
- “–” – Remove an item from the list.
- “+” – Add an item to the list.
- “>>” – Navigate into the next item.
- “<<” – Navigate into the previous item.
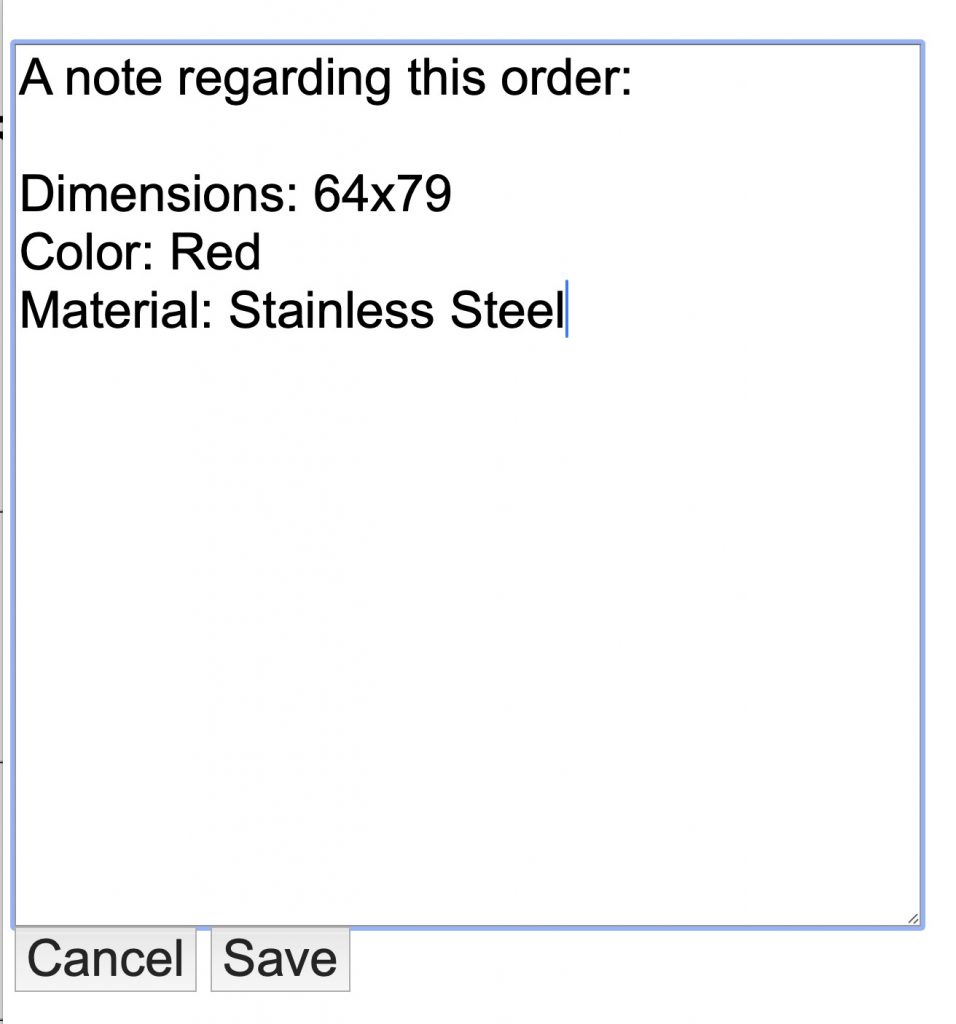
- Note – Add comments into your order.
- Signature – Sign your order.
- Email this order – Send order via Email.
- Save order – Save order (able to edit later on).
- Put order on hold – Pause order.
- Select the location, enter the inventory number and indicate the client order number.
- To open a new Note prompt and include it in your client order, simply click on the note.
- Upon clicking “Email this order”, a new prompt will appear, allowing you to choose a client contact to send the email to. If there are no client contacts available, you will have the option to create and add a client contact.
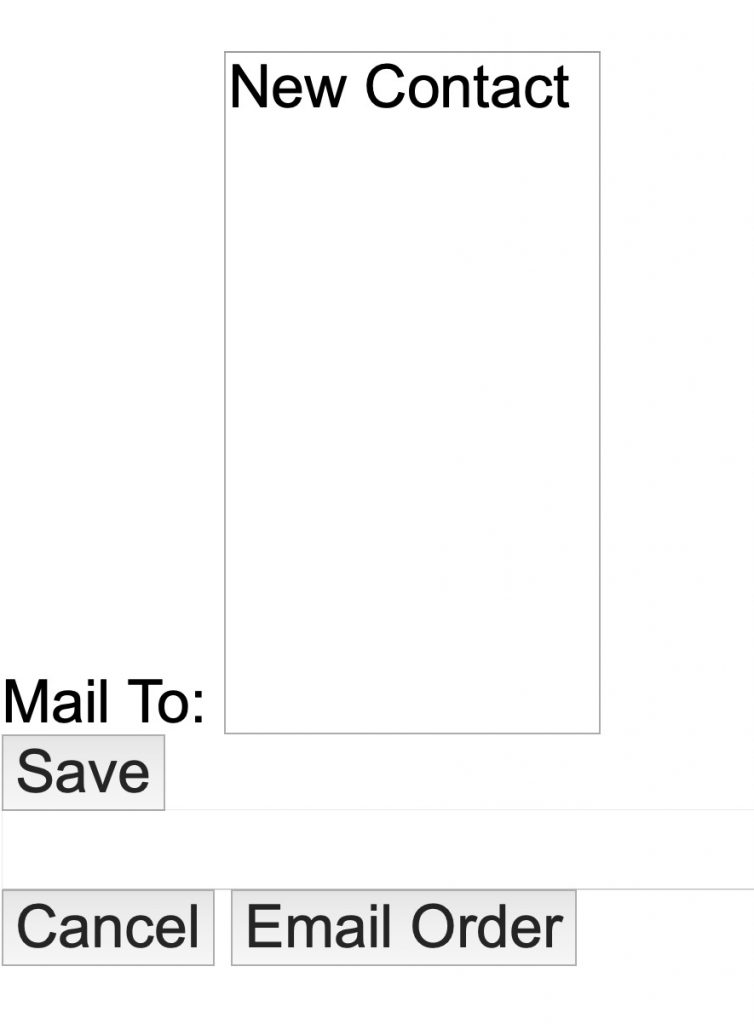
- Once clicked “Email Order” – your order process will be completed and you may see it in the ongoing orders list.
You can review our Blog and YouTube channel for additional information and resources on SapphireOne ERP, CRM and Business Accounting software.