Steps to Use API Integration with Australia Post & Startrack
O
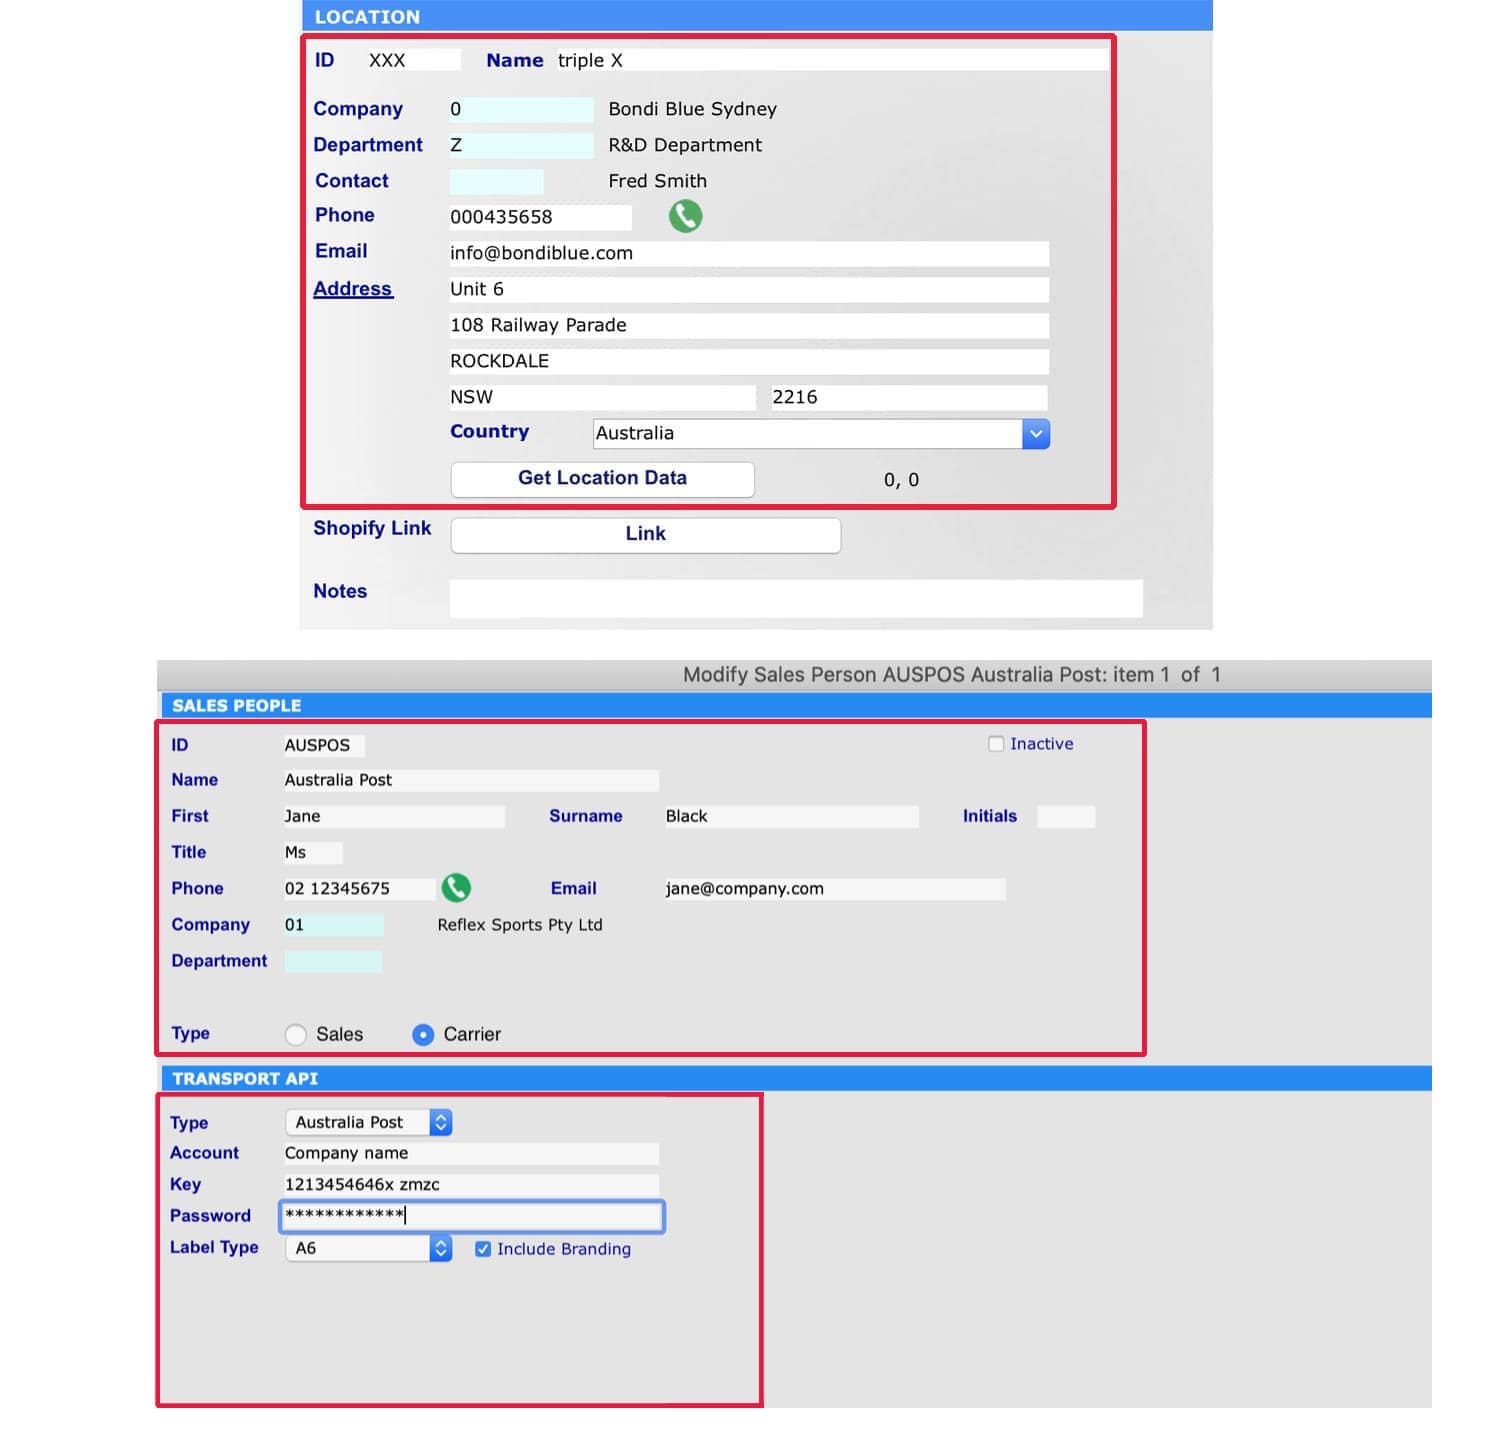
It is important you set up Locations correctly with all fields populated.
Set up Australia Post and Startrack as Carriers found under SALES > SALES PEOPLE > Add a new ID, Select Carrier button, Enter carrier account number, API key and password.
When entering orders ensure;
When Orders have been picked checked and converted to SCI and are ready for dispatch, Go to the Manager Menu.
This will create the Manifest for the days deliveries by carrier
Open the manifest and you will see all the SCI transactions for that carrier that have a delivery date of the despatch date.
NOTE: It is possible to create the manifest from the OCI but there are less issues if it is done once the OCI has been converted to an SCI as the posting confirms all stock is available for shipping and there are no Out of stock items.
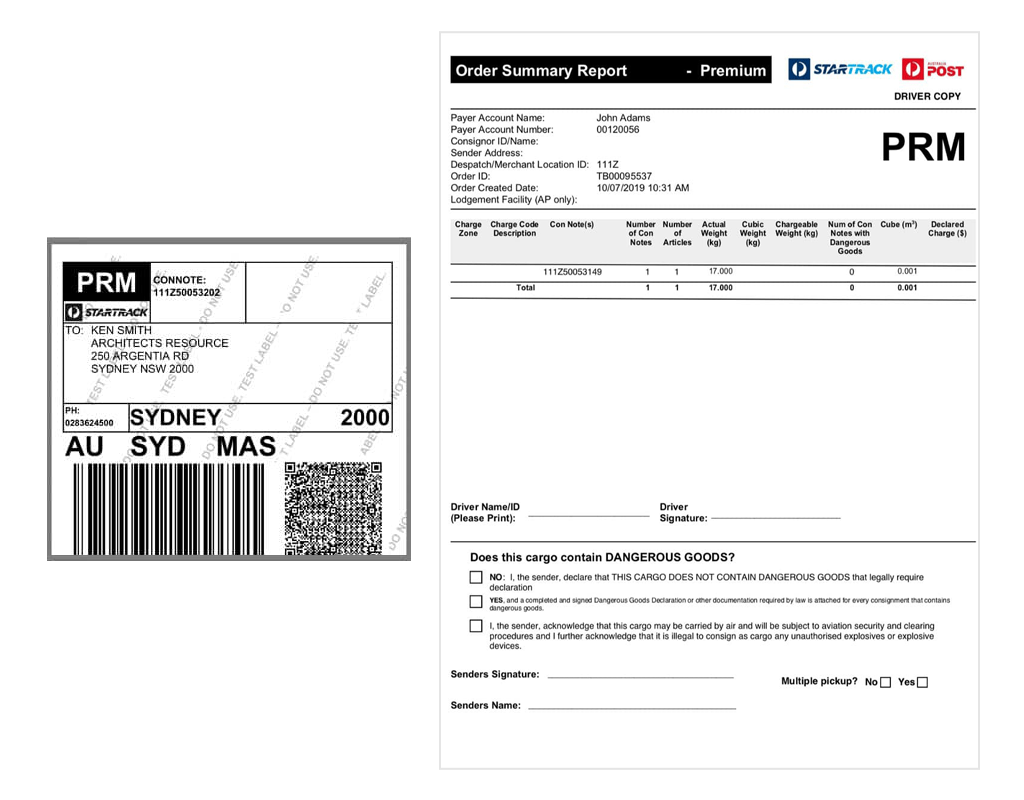
The Con Note will be on the Labels that print but it will not populate the Con Note field if there are more than one carton on an order as there is only one Con Note field per Order. We need to check with AusPost if they send the Delivery Customer an email or text from the carrier regarding connote/s of their shipment for tracking. We have given them access to the email address and phone number field on the API so if these fields are populated then they should be able to do this. You will need to ensure that the email address and phone number fields are populated for every customer delivery for this to be possible.

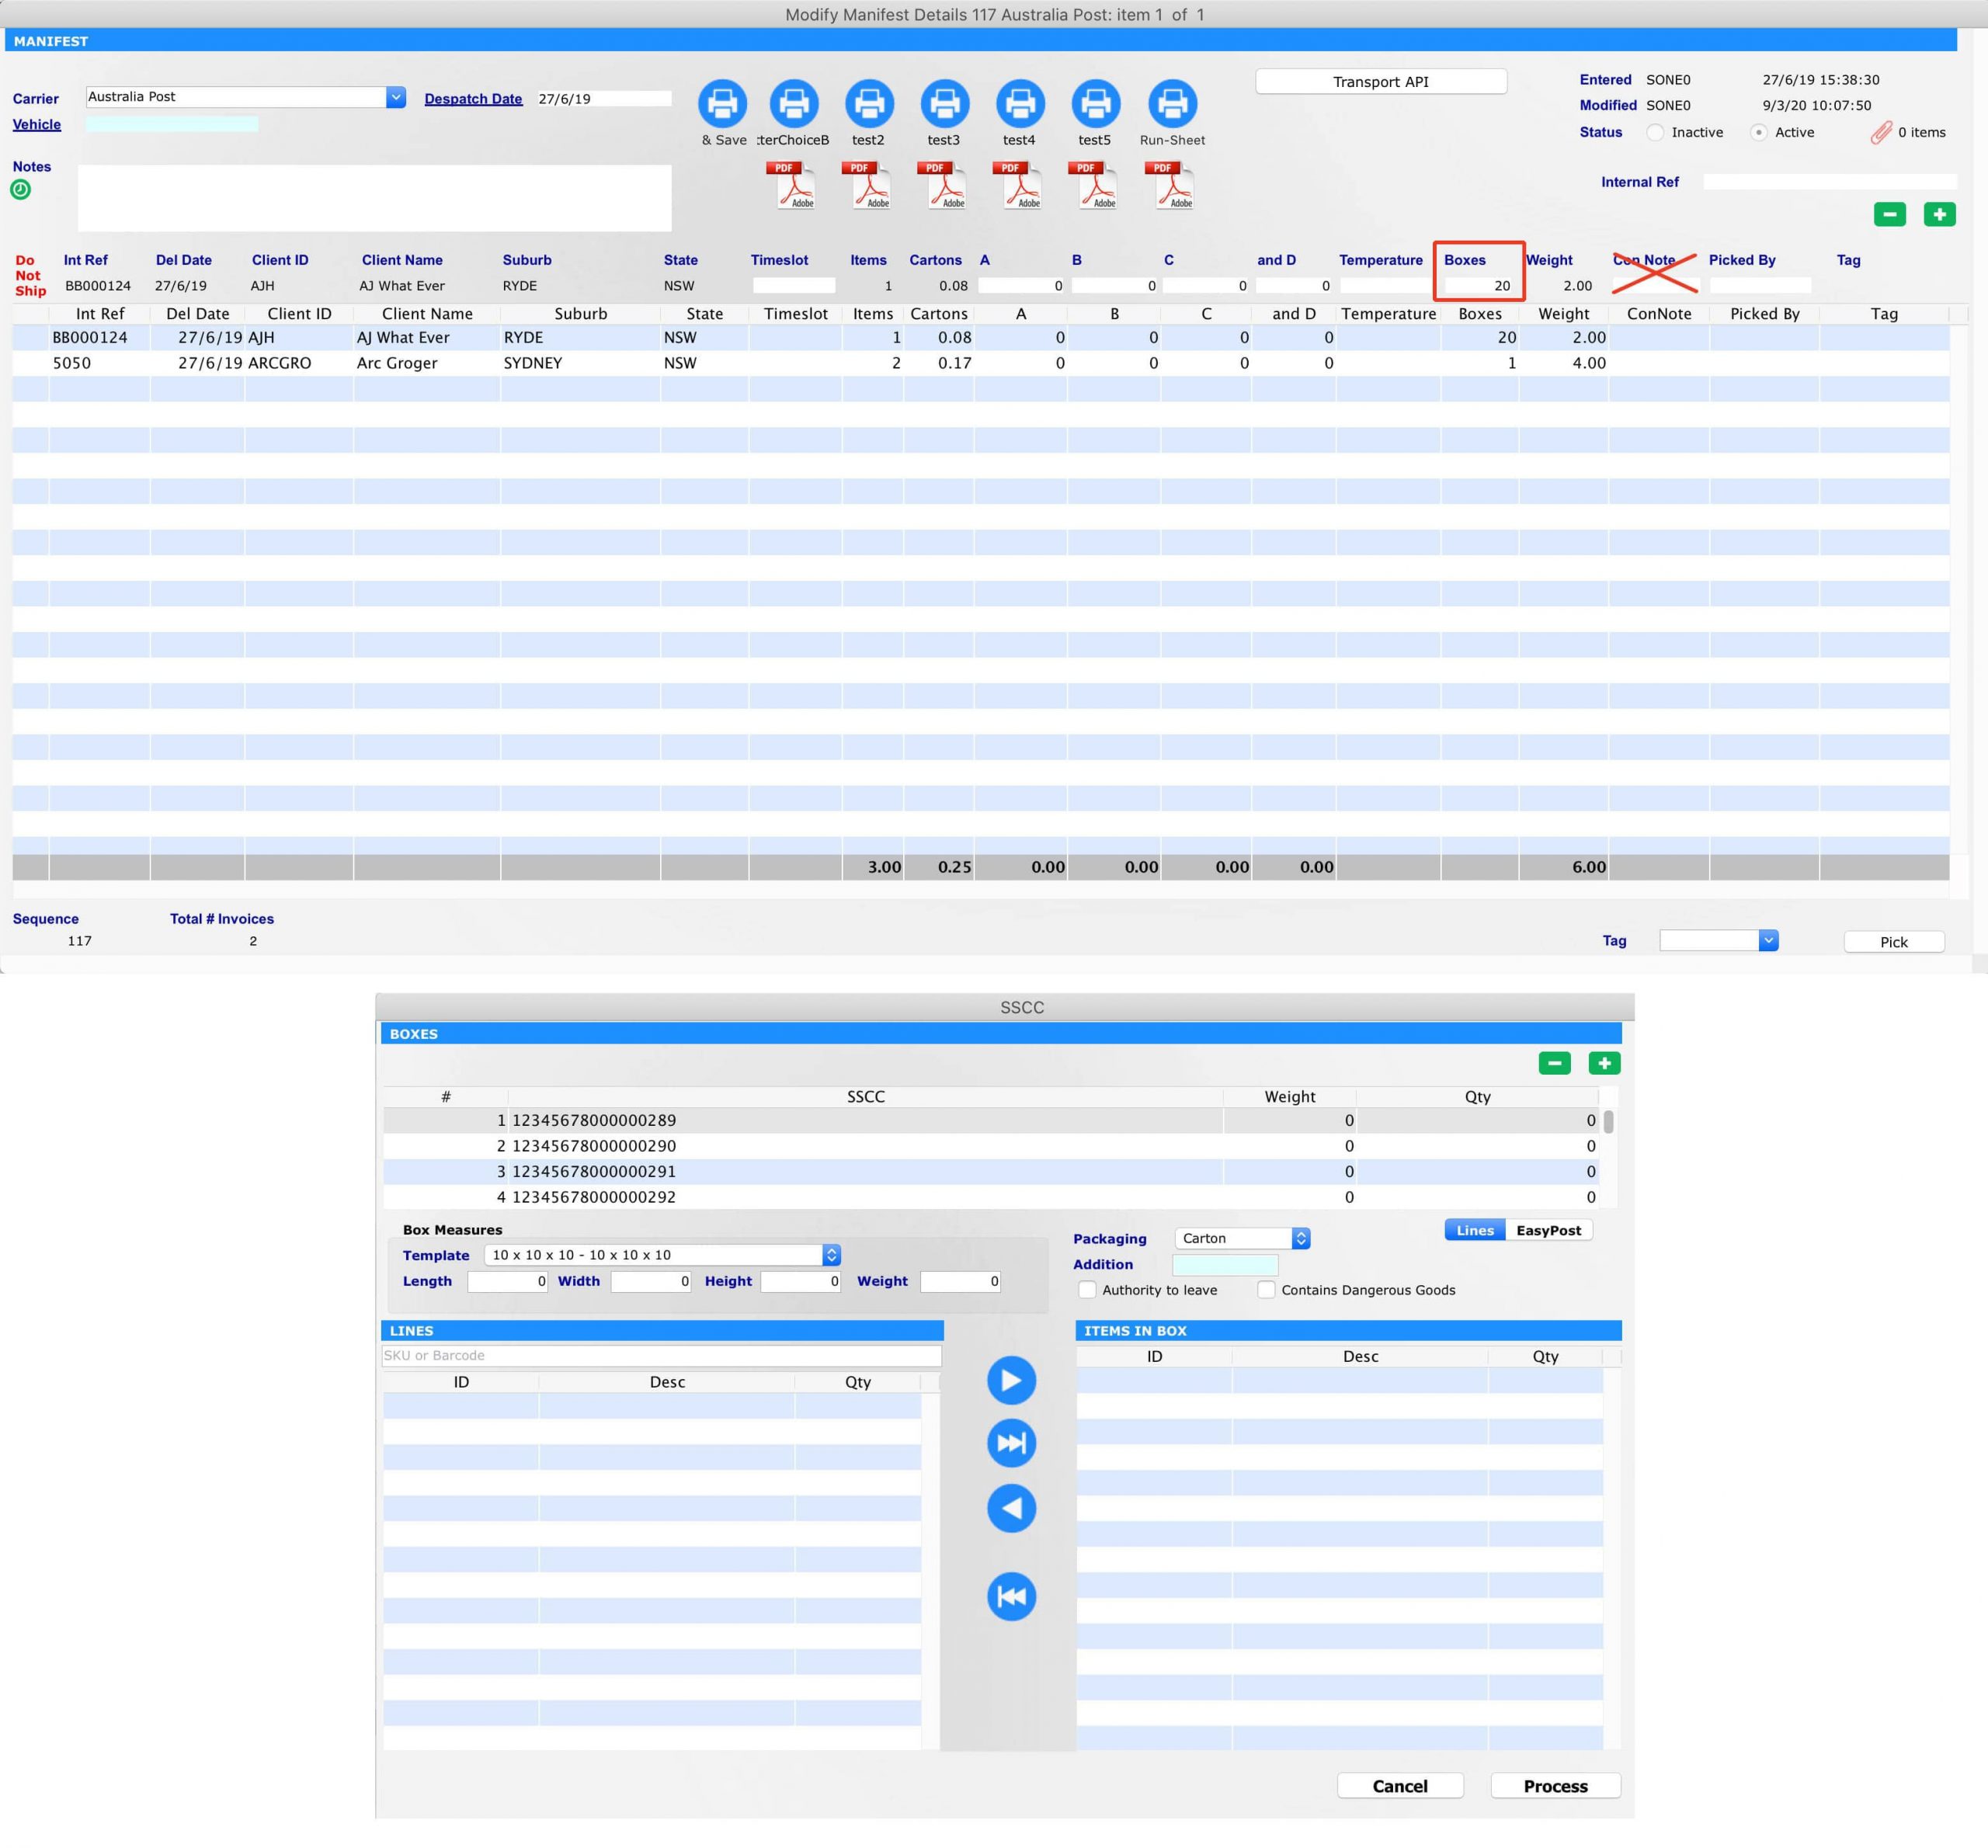
Highlight the first SCI and enter the number of boxes and enter will pop the new window below
Highlight a line under the SSCC and it will show in the Lines box below. Select it and scan item or Blue arrow it across to Items in Box it will show how many items are in the box > enter the Length, Width and weight of the box, repeat this with other boxes that may be on the SSCC area and Process.
Repeat these steps above with each transaction on the Manifest
When completed Select the Transport API button at the top of the screen.
The following screen shots I am using our Test Bondi Blue data file with our test API key and password.
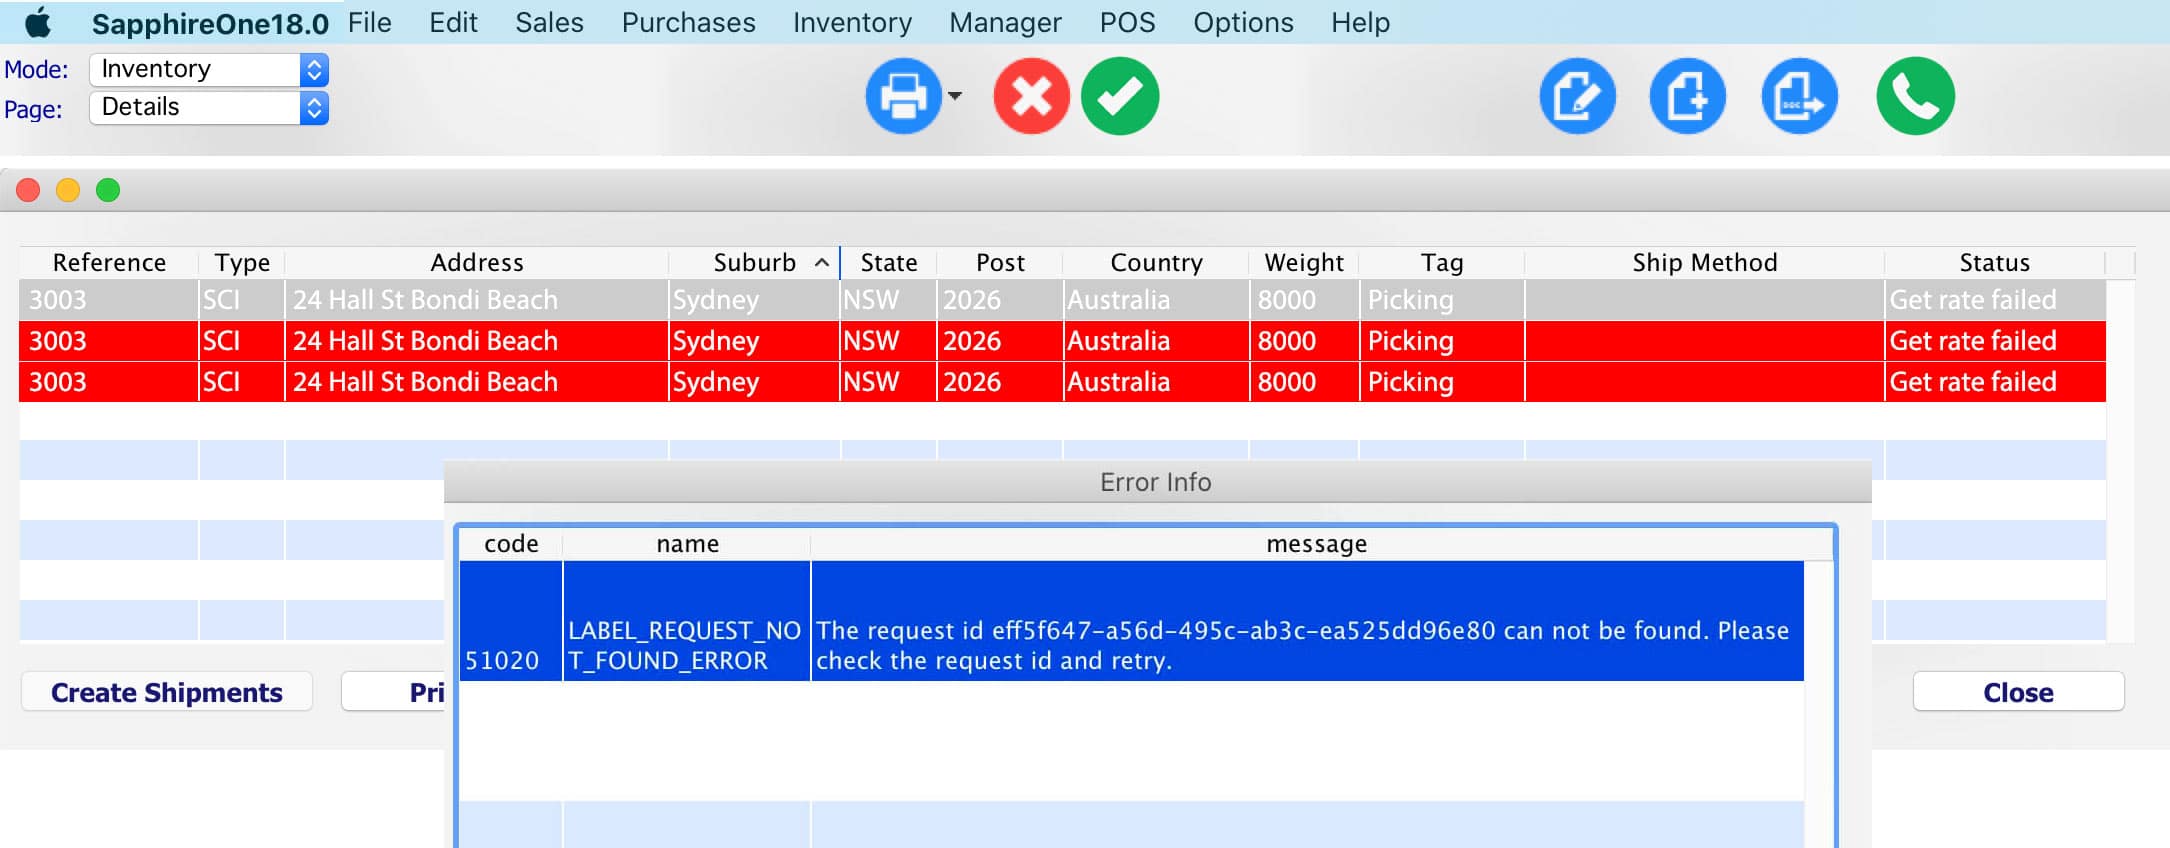
If there is any Error on the SCI submitted to the Carrier e.g Address not Valid you will get the below red lined status Get Rate failed and it you click on each red line you will get an error message of why it failed.
If an error occurs Close out of the Get Rates window back to the Manifest and select the print Icon with & Save underneath it. This will save the Manifest and take you to the Sale Invoice Inquiry transactions that are in Error.
You can then correct the errors in the address and go back to the manifest and select the Transport API button again.
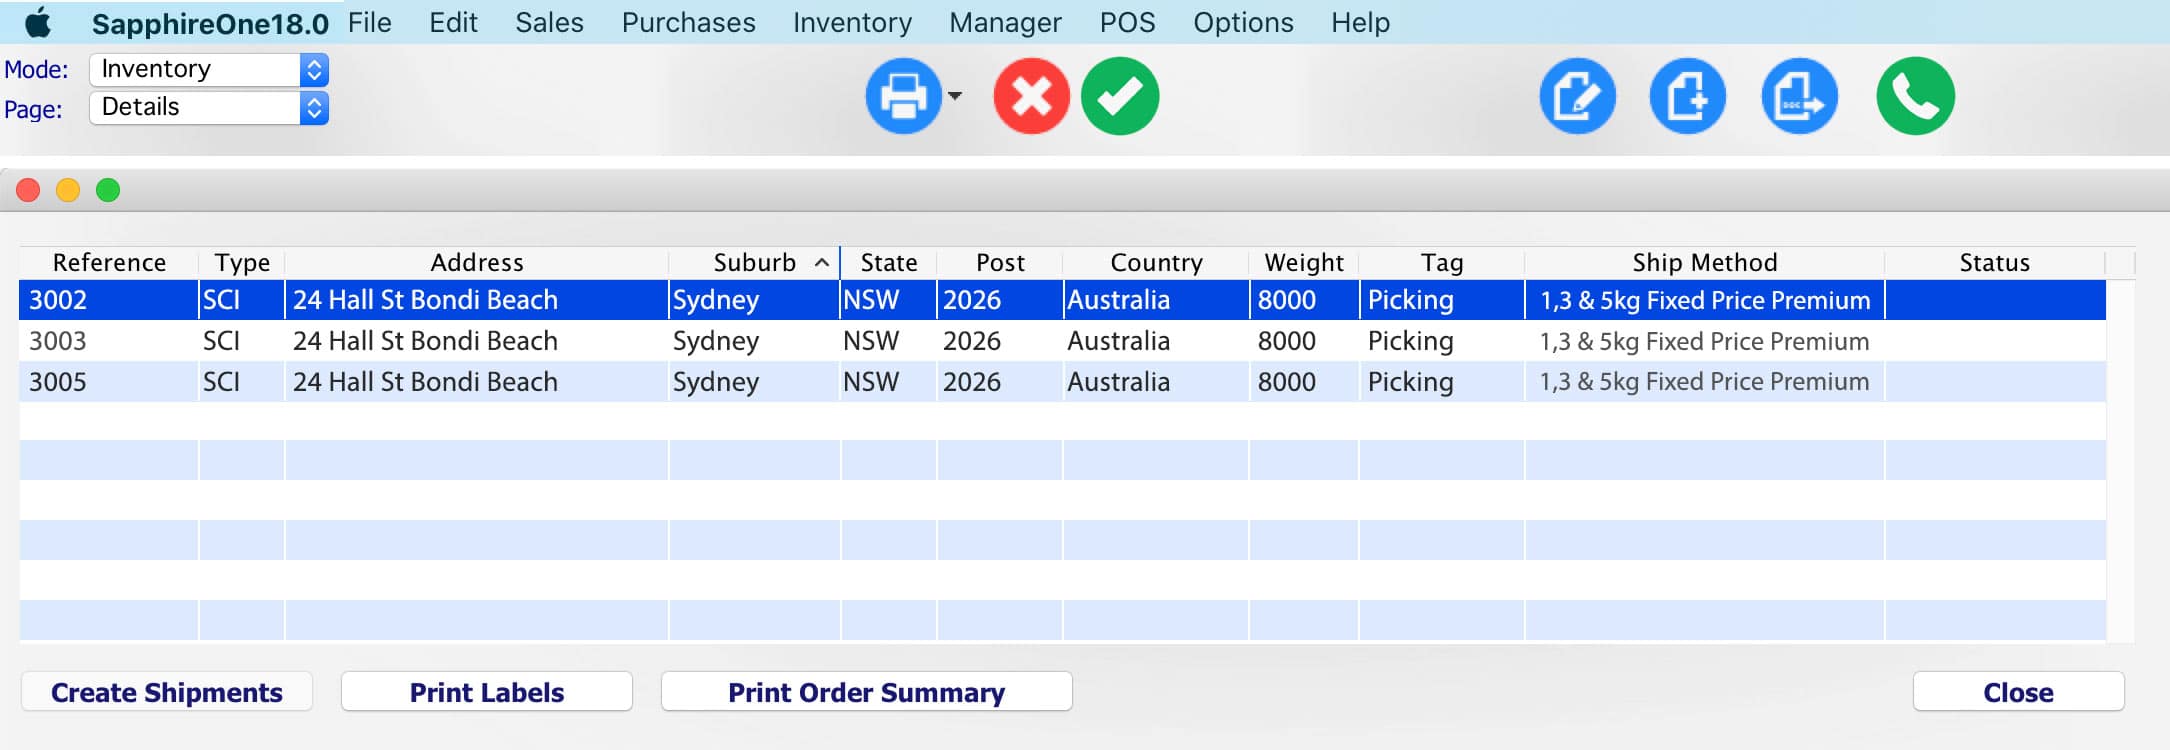
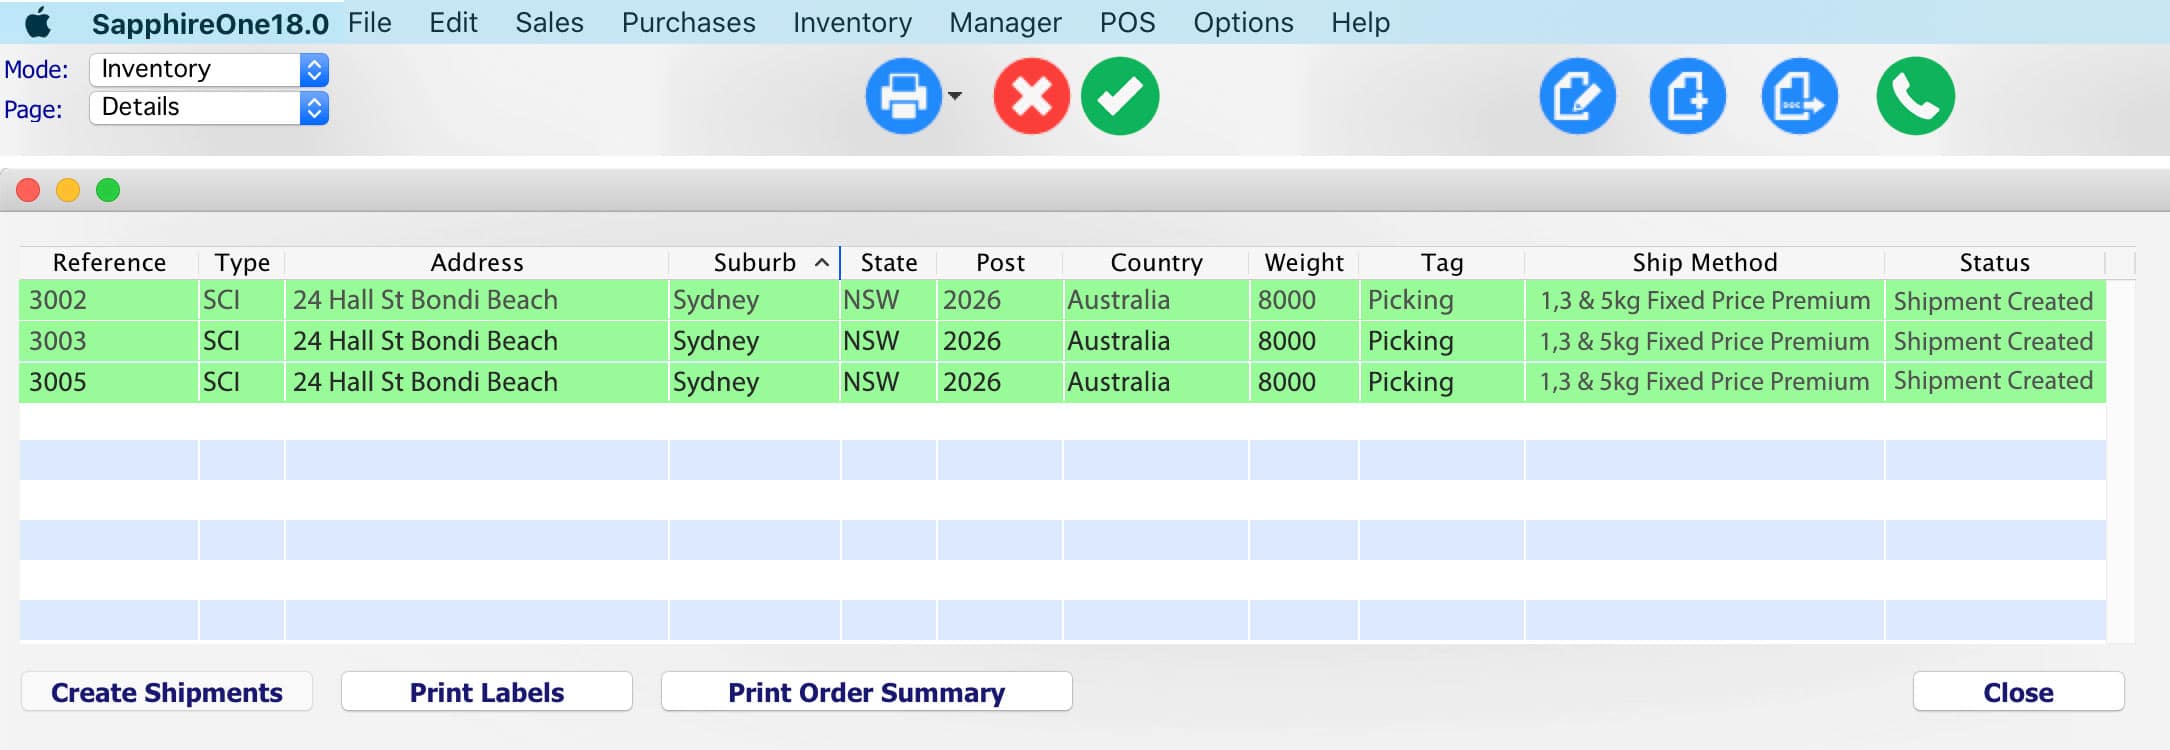
When you are happy with all the rates select create Shipment and if all ok the lines will highlight green and you can select Print labels which will open in a web browser and Command P will open the print window to select the correct printer and print the Labels.
Attach Labels to Cartons ready for Pickup and print the Order Summary which will have a copy for the driver and a copy for you to sign.