Job Project Inquiry Web Pack Overview
Sapphire Web Pack Job Project Inquiry provides a set of integrated features that allow an organisation to collect, track and analyse business activities and profitability across Job Projects of any scale, within your Sapphire Web Pack application. Job Project may be considered as any operation or group of operations pertaining to the management of a business related task. Once set up, the Job Project will be the repository for all transactions for that particular Job Project whether that be Inventory Transactions, Job Project Based Transactions or Account Transactions. All interactions will be monitored with the inbuilt Client Relationship Management (CRM) within the SapphireOne Job Project, and a complete history of all Transactions is stored for the life on the data file.
Sapphire Web Pack Job Project Inquiry has a total of three unique pages within the Job Project, as well as the Paperclip icon for Document Management and the Camera icon for Digital Assets. Each one of these pages has a very sophisticated interface relating to a particular heading of these three pages and the two icons.
First we have the Details page where we store the Job Project ID, Name, Parent, Class, Client ID, Tag, Status, Start Date, Estimated Finish Date, Actual Finish, Postal Address, Physical Address and unlimited Notes. Planning page contains the ability to plan the Job Project with unlimited tasks, the basic cost and billing of each task within the Job Project. There is also the ability to Clone Plan from another Job Project. Contacts is a complete list of all linked contacts to the Job Project providing full Contact Relationship Management (CRM). This function also allows you to select a Contact to modify contact details, as well as call or email directly, and add notes. Digital Assets provides unlimited digital asset storage. These may be PDFs, videos, photographs, JPEG, RAW, and HEIC any type of digital asset attached to your Job Project. Documents (DMS) is a record of all attached documents to this Job Project.
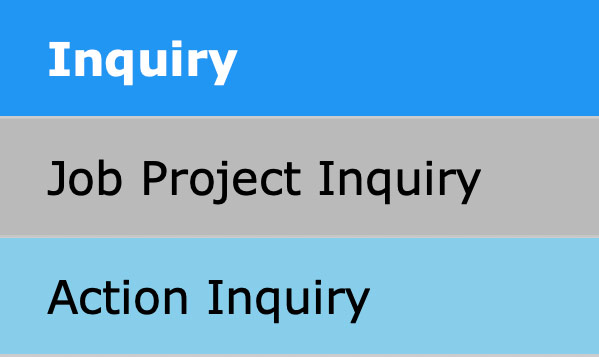
Job Projects Inquiry is contained within the Inquiry mode of Sapphire Web Pack.
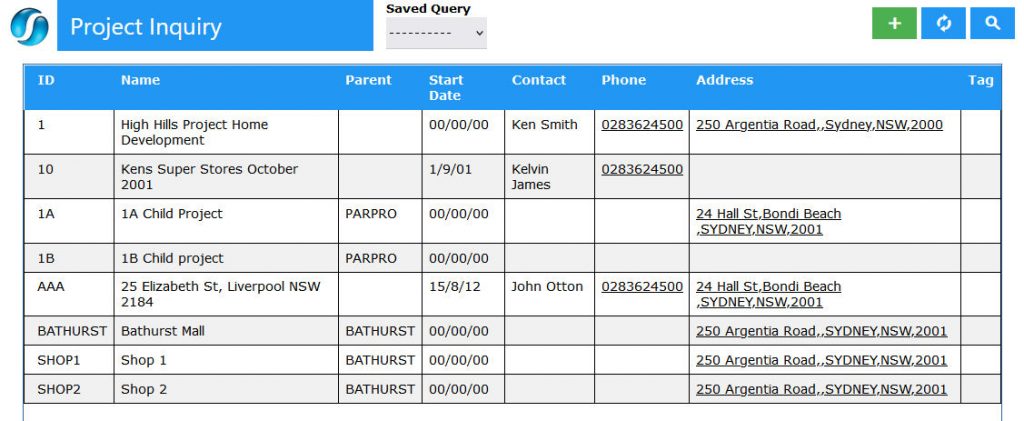
When the Job Project Inquiry Option is selected SapphireOne will display the list of Job projects that have a master record in SapphireOne. From here the user may, create a new Job Projects  , refresh the list
  , or perform a search for a Job Project or a group of Client Job Project
  . However, the View or Modify button
 ![]() , will not be displayed until the user selects or highlights a Job Project record as seen in the screenshot below.
, will not be displayed until the user selects or highlights a Job Project record as seen in the screenshot below.
When the list of Job Projects is on screen the SapphireOne will display all Job Projects that have their status set as Active. When their status is set as Finished or Hold they will not be displayed in the Web Pack.From the web pack the list of currently active projects is displayed below.
- To create in a new Job Project select the new icon. An alert will be displayed asking for a new Job Project ID and the Name of the Job Project. Once these details have been entered and the user has tabbed forward the Client data entry page will be displayed.
- To modify or look at an existing Job Project, select the Job project from the list, then select the
 modify icon. The look option is not provided in the web pack.
A second sub menu is displayed seen below, is the equivalent of the Page menu when the Client Server function is being used. This sub menu contains these items as follows. Details, Planning and Contacts.

When a Job Project is selected and opened each tab has four icons at the top right hand side of the screen.
These perform the following actions.
- Picture Icon – When this
 icon is selected, SapphireOne opens the picture function enabling the attachment of pictures to this Job Project function. SapphireOne supports the storing of pictures from both the Client Server mode of operation as well as here using the web pack. If a smart phone is being used a picture may be taken and directly uploaded to the data file.
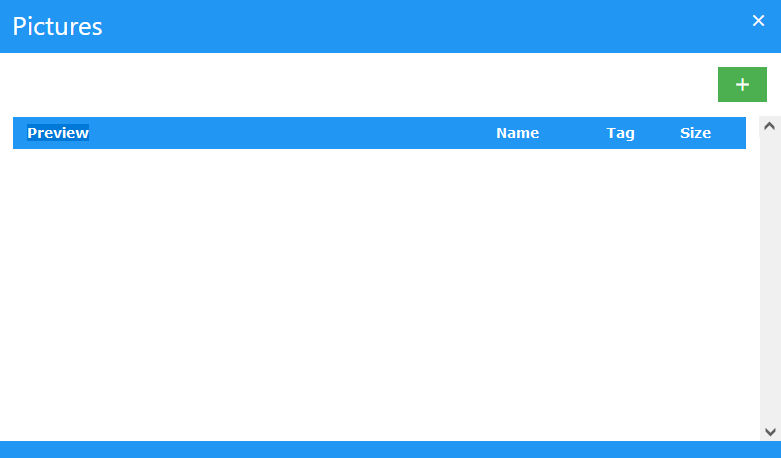
Once the ![]() icon has bee selected SapphireOne will display the Picture alert. Any pictures already attached to the Job Project will be displayed in a list.
icon has bee selected SapphireOne will display the Picture alert. Any pictures already attached to the Job Project will be displayed in a list.
The user must select the ![]() icon at the right hand side of the alert to commence the procedure for the addition of a Picture to the Job project..
icon at the right hand side of the alert to commence the procedure for the addition of a Picture to the Job project..
The New Picture alert below will be displayed which allows the user to name and then upload a picture.

- Picture – First select the
 icon. SapphireOne will now display the search function on your local machine enabling the user to select the required picture.
 - Name – Enter in a Name for the new picture.
- Tag – If required enter in a Tag for the picture but this is optional.
- Size – From the supplied list select a size for the picture, remembering that large pictures will make the data file grow very big very quickly. Options are Actual, 960, 720 and 480 px which is pixels wide.
- Upload – Next select the
 icon. This will upload the selected picture to the SapphireOne data file in the size that has been selected.
- Document Icon – When this
 icon is selected, SapphireOne will open the document screen as follows.
- No Documents – If there have not been any documents attached to the Job Project, SapphireOne will immediately open the local machines search for a file function allowing the user to attach the first document to this Job Project record.
- Documents Exist – If there is a document attached to the Job Project, SapphireOne will display the Documents alert. From this alert the user may double click on a document in the list to view it, or select the
 icon allowing the user to search for and select a document to be attached to this Job Project record. Deletion of documents is not provided for in the Web Pack function.
- Cancel Icon – When this
 icon is selected, SapphireOne closes the Job Project record without saving any changes since it was opened.
 - Save Icon – When this
 icon is selected, SapphireOne saves the Job project record and then closes it.
Details Tab in Job Project Inquiry
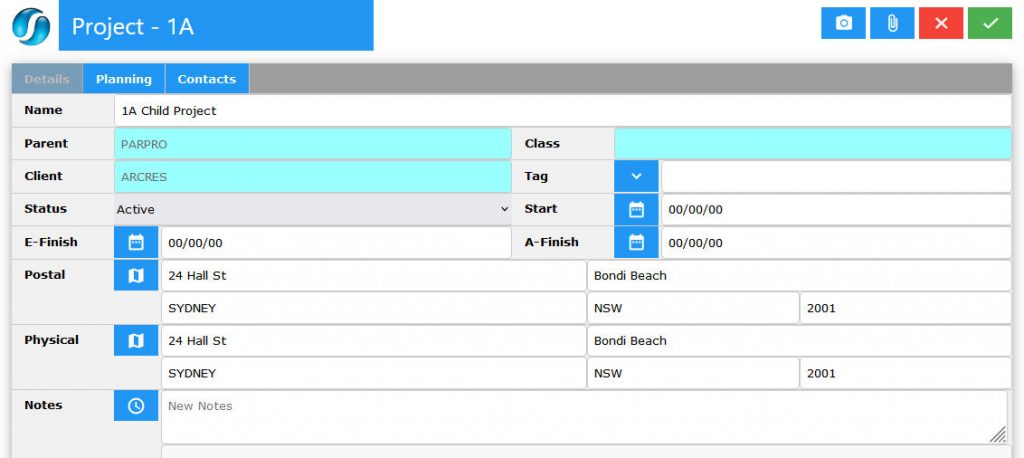
The details tab has most of the data entry fields as in Client Server mode.
- Name – The name of the project is displayed here and may be altered if required.
- Parent, Class, Client and Tag – These are entered into their respective data entry fields and may be entered as required.
- Status – This is by default set as active.
- If not set as active you will no longer be able to view this Job Project from the Web Pack!
- Start – Enter in a Start date for the Job Project.
- E-Finish – Enter in an Estimated Finish date.
- A-Finish – Enter in the Actual finish date for the project as it is completed.
- Postal – Next enter in the postal address for the project.
- Physical – Enter in the physical address if it is different to the postal address.
Both the Postal Address and the Physical Addresses are hyperlinked fields. When the ![]() hyperlink icon is selected next to the address, the default browser in the local machine will access Google maps and display the location on their mapping system. That is provided that the address is correct and in the Google mapping data base.
hyperlink icon is selected next to the address, the default browser in the local machine will access Google maps and display the location on their mapping system. That is provided that the address is correct and in the Google mapping data base.
Any notes applicable to this Client are displayed at the bottom of the window.
Dictation and Speech to Text Overview
SapphireOne’s implementation of both Dictation (MacOS) and Speech to Text (Windows) is a game changer for data entry. Any data entry field you can type into using a keyboard can use this feature.
You can also use this functionality on all inquiry screens within SapphireOne. For example, the user is in a Contact within a Client. They may have made a phone call to that particular client using the Softphone technology. Consequently, this will automatically date and time stamp both the contact and the phone number you called.
As soon as the call is completed, the user has the ability to use Speech to Text (Windows) or Dictation (MacOS). They can dictate into the memo field of the CRM contact, adding as much description as they require.
Dictation and Speech to Text Procedure
This functionality applies across every single Data Entry screen. For example, the SapphireOne user is entering a Vendor Invoice (VI). Additionally, you may want to add a memo within the Vendor Invoice (VI). The user can utilise the tool and simply dictate the memo.
Another example is if the user wants to add additional lines to the General Ledger account, within each General Ledger account. When the user is completing data entry using a General Ledger, there’s always a unique memo field for each GL account line.
The user can then utilise this feature to quickly add the information they need to add. Alternatively, you may have an interview with an employee. After the interview process is completed, the user can then make notes about the employee.
Speech to Text or Dictation is an extremely powerful tool. It is something that we at SapphireOne, as well as our clients, utilise daily. It is a massive time saver.
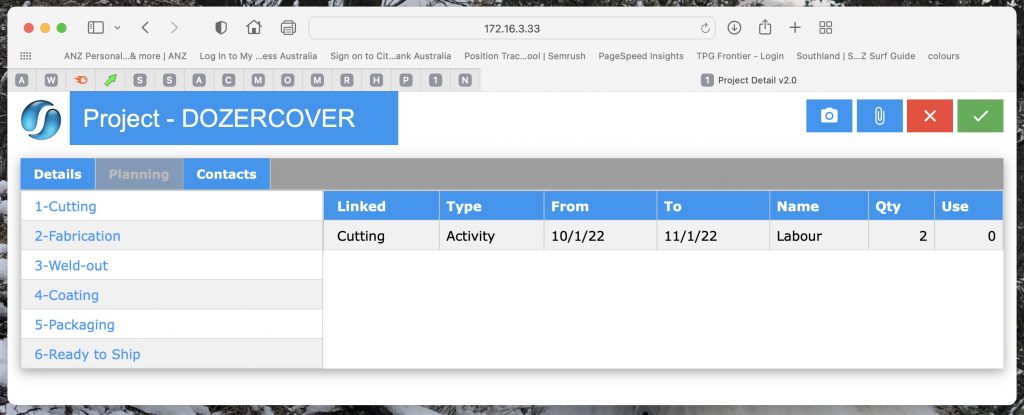
Planning Tab
The next tab is the Planning page as seen below.
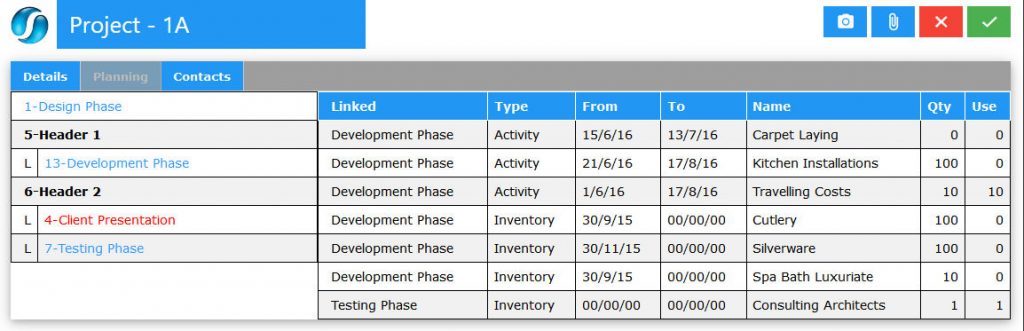
The user will note that there is no provision for the addition, modification or deleting of any of the items on this screen. Additional details may be viewed for each item by using the mouse to make a selection from the left hand column. As each item is selected complete details will be displayed in the columns from Linked through to Use.
For example, a Fabrication company has six different stages for a Job Project to be completed. These six include Cutting, Fabrication, Weld-Out, Coating, Packaging and Ready to Ship. The Fabrication company can use the Planning / Quote page to set up each stage of the job project and keep track of each stages progress.
The Fabrication company has the ability to track and report on the length of time that a job stays in each stage by adding timesheets reporting on the date and number of hours spent within each stage. As seen in the example below, one time sheet has been added to the Cutting stage demonstrating that two hours has been spent to date on this stage.
Contacts Tab
This tab is the contacts Page from a Job Project. All contacts that have been set up for the Job project will be displayed in a list when the contacts tab is selected as seen below.


To create a new contact and add them to the list select the ![]() icon at the top right hand side of the list.
icon at the top right hand side of the list.
The usual Name, Surname and Position data entry fields are provided for the user.
Two telephone number data entry fields are also provided for the entry of telephone numbers for the contact.
If the splice Com telephone system has been setup, any calls made to or received from the contact will be stored here in the contact record as a log of the call.
In addition the user may enter any details about the telephone call that they may wish to record. Very handy when you need to be reminded what a previous call was about.
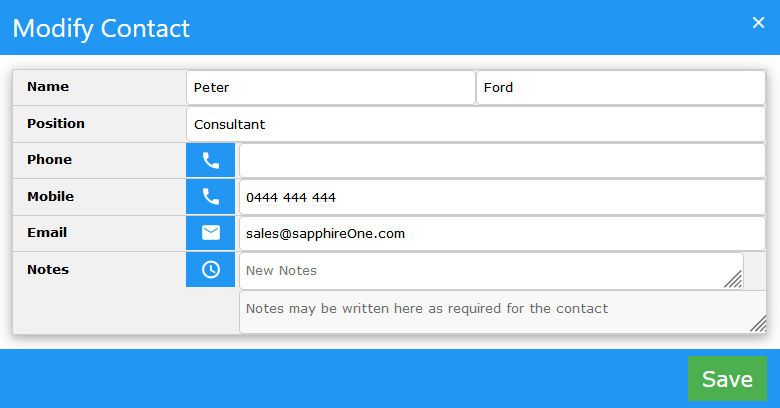
To modify an existing contact, move the mouse over the required contact. The contact will be greyed out so left mouse click.SapphireOne will then display a screen similar to the one above enabling the alteration of the contacts details. Both screens are the same except the the screen will display Modify Contact instead of New Contact as seen above
When these have been entered select the ![]() icon to save your modifications.
icon to save your modifications.
While not all contact details may be modified from the web pack all of the most common data entry fields have been provided for as may be seen in the screenshots above.
You can review our Blog and YouTube channel for additional information and resources on SapphireOne ERP, CRM and Business Accounting software.