The Order Build Journal feature (OBJ),is located as the third option on the SapphireOne Inventory Data Entry menu. Its purpose is to facilitate the assembly of multiple Base Inventory items into a single Built Inventory Item. Essentially, the Build Order Journal is functionally identical to the Build Journal.
To illustrate, consider a scenario where you anticipate the need for several built items in the future to fulfill a Client Order (OCI). This future time frame could range from days, weeks or even a month. The main challenge you might encounter is determining whether you will have an adequate inventory stock available when you are prepared to initiate the OCI.
The data entry process for both an Order Build Journal (OBJ) and a Build General Journal (BGJ) is identical. Therefore, in this OBJ documentation, we will not provide a comprehensive description of the data entry procedure for OBJ. Instead, we recommend referring to the article titled Build Journal for detailed documentation on the data entry procedure.
However, it is essential for users to take note of the comments below, which highlight the differences between the two journal types. These comments will provide valuable insights into any variations or specific considerations when working with an OBJ or a BGJ.
Build Order Journal Overview
- Allocation – When a Build Order Journal is created, the stock is not immediately allocated upon saving the journal entry with the
 tick.
tick.
- Posting – However, when the Build Order Journal is subsequently posted, the inventory stock is promptly allocated to the corresponding transaction.
- Build Journal – In contrast to the Build Order Journal, the Build Journal functionality immediately allocates all inventory items upon saving with the tick. This key distinction sets it apart from the Build Order Journal.
- BackOrder – In case of any inventory items being insufficient in stock, SapphireOne will indicate this by displaying them as backorder components on the first page of the inventory items. This serves as a clear notification of the items that are currently not is stock.
- Transaction Type – SapphireOne saves this transaction as OGJ (Order Goods Journal) and allocates the stock accordingly, but it does not have any impact on your general ledger accounts.
- Checking Stock – After creating the Build Order Journal, the user can verify the stock levels to ensure they are adequate before converting it into a Build Journal. This step allows the user to double-check that there is enough inventory available to fulfill the build order before proceeding with the conversion as documented next.
- Converting – When you are prepared to proceed, you will find a
 checkbox at the bottom of the screen. By selecting this checkbox and subsequently saving the entry, the OGJ (Order Goods Journal) will be converted into a standard Build Journal item, known as BGJ (Build General Journal). This conversion process allows for the transition from the initial order stage to the actual build stage.
- Saving – Once this is selected and then saved, this OGJ will be converted to a Build Journal item a BGJ.
- Build Journal – In addition, users have the option to directly create a BGJ (Build Journal) in SapphireOne. This functionality is documented in a separate article, providing detailed instructions on how to initiate and document the build process directly by creating a BGJ. This feature allows users to bypass the Build Order Journal function and directly allocate inventory items for the build, streamlining the workflow for efficient inventory management.
- Saving – Once all the necessary data entry has been completed for the Order Build Journal (OBJ), the user can save the journal entry by selecting the normal tick or save button. This action confirms and saves the OBJ, capturing all the entered information and making it available for further processing or reference within the system.
Dictation and Speech to Text Overview
SapphireOne’s implementation of both Dictation (MacOS) and Speech to Text (Windows) is a game changer for data entry. Any data entry field you can type into using a keyboard can use this feature.
You can also use this functionality on all inquiry screens within SapphireOne. For example, the user is in a Contact within a Client. They may have made a phone call to that particular client using the Softphone technology. Consequently, this will automatically date and time stamp both the contact and the phone number you called.
As soon as the call is completed, the user has the ability to use Speech to Text (Windows) or Dictation (MacOS). They can dictate into the memo field of the CRM contact, adding as much description as they require.
Dictation and Speech to Text Procedure
This functionality applies across every single Data Entry screen. For example, the SapphireOne user is entering a Vendor Invoice (VI). Additionally, you may want to add a memo within the Vendor Invoice (VI). The user can utilise the tool and simply dictate the memo.
Another example is if the user wants to add additional lines to the General Ledger account, within each General Ledger account. When the user is completing data entry using a General Ledger, there’s always a unique memo field for each GL account line.
The user can then utilise this feature to quickly add the information they need to add. Alternatively, you may have an interview with an employee. After the interview process is completed, the user can then make notes about the employee.
Speech to Text or Dictation is an extremely powerful tool. It is something that we at SapphireOne, as well as our clients, utilise daily. It is a massive time saver.
Action Page
Action Page Overview
The Action Page is a versatile tool that can be added to major records and transaction tables. It includes various actionable items such as Calendar Reminders, Meeting Invites, Alarms, Emails, To-Do Lists, General Notes, Private Notes, Meeting Notes with Date and Time, Start and Finish stamps, as well as All Day Notifications. This provides users with a centralised location to manage and organise their tasks, meetings, and notes, improving efficiency and productivity.
The Action Page allows users to use the add ![]() or delete
or delete ![]() buttons to add or delete actions as required. Simply select the relevant button to add or delete an action.
buttons to add or delete actions as required. Simply select the relevant button to add or delete an action.
Diary Area
The Diary Area in SapphireOne provides users with a comprehensive range of options to customise their actions. It includes a sequence number, title, type, action, user, privacy settings, status, tag, and link fields.
- Sequence – SapphireOne automatically generates a unique sequence number for each action.
- Title – Enter a title for the action.
- Type – Choose from the customisable drop-down menu to input a type. This will subsequently become a permanent type within the drop-down.
- Action – Utilise the user-customisable drop-down menu to input an Action. This will then become a permanent action within the drop-down.
- User – SapphireOne automatically inputs the user creating this action, though it can be modified if necessary.
- Private – If this checkbox is selected, SapphireOne will only permit the specified user to view or modify this action.
- Status – The user has three options: Open, Hold, and Completed.
- Open – Action is open and active.
- Hold – Action is active, but no alarms will be active.
- Completed – Action is now Inactive and won’t be displayed in any list of actions.
- Tag – Users may attach a tag to an action, which will create a permanent tag within the drop-down. To add a new tag, type the name of the new tag into the tag box and press the tab key. Select “Yes” from the pop-up window to confirm. To remove a tag from the list, click on the tag name while holding down the Command (MacOS) or Control (Windows) key. Select “Yes” from the pop-up window to confirm the deletion.
- Link – When created within a transaction or record, SapphireOne automatically generates a link to the transaction or record. When created from the Options Menu, Palette, or Workbook, users must select an item or function from the drop-down menu to link the action. There are 12 items on this list, ranging from Clients to Manager.
Check List Area
SapphireOne offers a user-friendly checklist tool to create and track actions, allowing users to check off completed items as they progress.
Dates and Times Area
- Start/Finish – Set a Start and Finish time for the action, or select the checkbox for an all-day option.
- Completed – Entering a completion date for an action deactivates it, and it will no longer appear in action lists.
Alarm Area
Never forget a task again – set up alarms to send reminders via email at specific dates and times. Users can also receive email notifications with the provided email address.
Recurring Area
If necessary, the alarm can be set to recur at intervals selected from the Type drop-down menu. Additionally, the recurring period can be defined by date.
Notes Area
Click the green clock button to add time and date stamps to your notes. You can also customise the font, style, color, and background color of the text in the Notes area by highlighting it and right-clicking.
Invite Attendees Area
In the event module, you can invite multiple attendees to your event and track their acceptance or rejection of the invitation. You can also send them an email notification if their email addresses are provided. Additionally, you can manage and track attendees’ RSVP status in real-time.
Documents Page
Documents Page Overview
The Documents Page centralises document and information storage for transactions and master tables, streamlining organisation and management for easy access and improved efficiency.
Documents Area
The Documents Page simplifies file management by allowing various document types to be attached via drag and drop, including PDFs, spreadsheets, photos, and more. It provides a centralised location for document and information storage for transactions and master tables, streamlining organisation and management for easy access and improved efficiency.
Documents can only be attached once the corresponding record has an assigned ID.
Documents List Screen Options
There are eight buttons on the Document List screen, as follows:
- Open
 – Allows viewing of the currently selected document.
 - Update
 – Prompts the user to import a new version of the selected document while maintaining links to any associated transactions.
 - Scan
 – Accesses a scanner for scanning documents directly into the data file and linking them to the current transaction (requires a compatible scanner with software).
 - Save
 – Saves the currently selected document.
 - Link Document: Enables linking of the selected document to other transactions in the data file, presenting a popup for user selection.
- Link Document
 – Allows linking of an existing document in the data file to the current transaction or record, displaying a popup with a list of documents to choose from.
 - Link Existing Document
 – Allows linking of an existing document in the data file to the current transaction or record, displaying a popup with a list of documents to choose from.
 - Delete
 – Deletes the currently selected transaction or record.
 - Add
 – Displays a search function for selecting a document from the local computer or device.
Details Area
The Details area allows users to add a custom name, description, and tags to each document, enabling easy search and location of specific documents. These details can be customised to meet the specific needs of the user or organisation, further improving the efficiency and organisation of the Documents Page.
Last Modified Area
The Last Modified section displays the date and time when the document was last modified, as well as the user who made the changes. This feature helps maintain accountability and enables efficient tracking of document modifications.
History Area
The History area records changes made to the document, including the date, time, and user who made the changes. This provides a valuable tool for tracking and managing document revisions.
Links Area
The Links area allows users to record links to other places where the document has been attached. Links can be added or removed using the (+) and (-) buttons, providing an efficient way to manage and organise related documents.
Notes Area
The Notes area allows users to add any relevant notes related to the document. Clicking the green clock button will add a date/time stamp, further improving document tracking and management.
Workflow Page
Workflow Page Overview
Before setting up any workflow functions, the Organisation Chart must be setup first. please read the article titled Organisation Chart.
The Workflow Rules function in SapphireOne enables users to establish rules and procedures for the approval and processing of transactions. You can create Workflow Rules in the following location: Utilities > Controls > Workflow Rules.
Once you’ve set up the Workflow Rules, they can be viewed from most Inquiry Lists in SapphireOne when a transaction is opened for viewing or modification. The Workflow Rules Page displays the rules applicable to the currently opened transaction. Users can view this page with the following restrictions:
- User Access – Although all users can view the Workflow Rules relevant to the currently opened transaction on screen, they are not allowed to modify the Workflow Rules.
- Workflow User – When the user responsible for performing a task for the transaction accesses the Workflow Rules Page, they can approve or reject the transaction for further processing.
In Management mode, you can access the Workflow Centre from the main menu: Management > Analysis > Workflow Centre.
To access this function, users must have the Workflow Centre item selected or ticked on the menus page in their User Access file. The Workflow Centre provides a list of all transactions in the data file that have a workflow restriction incorporated into them. This feature allows users or groups of users to manage all transactions with a workflow restriction or error placed on them.
A Workflow Rule must be set up before entering any transactions. The rule is embedded into the transaction itself upon entry and will persist even if the workflow rule related to the transaction is removed. If a workflow rule is modified and there are existing transactions that need the updated workflow rule applied to them, these transactions will have to be deleted and re-entered under the new Workflow rule.
Setting Workflow Rules in SapphireOne
Once you’ve created the stages, you can assign the appropriate user or group of users to each stage. SapphireOne allows for the creation of any number of groups with multiple users within each group, enabling various workflows and approvals to be applied to different transaction types or departments within a company. You can also set a time limit for each stage, which facilitates automated reminders to be sent to users who haven’t yet approved or notified the workflow rule.
SapphireOne has the capability to generate email notifications and reminders to be sent to users at each stage of the workflow process. These email notifications can be customised to include specific information about the transaction, such as the transaction ID, date, and amount.
Once a workflow rule has been created and applied to a transaction, it will be displayed on the Workflow Rules Page for that transaction. The user responsible for approving or notifying the workflow rule can access the Workflow Rules Page and take action accordingly. Once all stages of the workflow rule have been completed, the transaction will be authorised and can proceed to the next stage in the process.
Overall, setting workflow rules within SapphireOne provides a powerful tool for companies to manage their approvals and authorisation processes while also improving their efficiency and accuracy in handling transactions.
Workflow Example
Imagine you’ve set up a workflow rule with five stages. To progress from Stage 1 to Stage 2, it requires approval from a minimum number of users authorised to approve Stage 1, which could be set to 3 out of 5 users, for example. These authorised users can be assigned to a level within Stage 1, and you can choose to assign a type to the level, such as User, Level, or Creator. For each type, you can enable or disable checkboxes for Authorisation Required, Hierarchical Authorisation, and Email Notification.
Another example could be a workflow rule for Leave Requests. Stage 1 might involve an employee entering a Leave Request, which then moves directly to Stage 2, where the manager is notified. Stage 3 could involve HR approving the leave, and Stage 4 could be notifying the original creator (employee) whether their leave has been approved or not.
When a new transaction is created with a workflow rule, it will have an error status of “WF” and cannot be printed, converted, emailed, or posted until it has been authorised by the assigned user, group, level, or creator. If a transaction is rejected, it will remain in the list with an ongoing “WF” error status. It can then be left as is or deleted as needed.
For each rule that includes a Workflow entry, a user or group of users must be designated with a restriction, which will result in them generating all or some transactions with an error code of WF.
Moreover, a user or group of users must be set up to approve these transactions. The selection is made using the two checkboxes: ‘Authorisation Required’ and ‘Hierarchical Authorisation’.
Workflow Rules Details Page
The Change button, as seen in the screenshot below, is directly linked to the Organisation Chart function found in the Controls drop-down menu. The Organisation Chart function serves as a means to organise multiple users within a hierarchical group. This feature is further documented in a separate article on the Organisation Chart.
Details Area
The available options are as follows.
- Sequence – SapphireOne will enter a sequentially generated number, and it cannot be altered.
- Title – Enter a Name or Title for this workflow entry.
- Tag – Enter a Tag if required. Keep in mind that this list of tags can be set up by the user as needed.
- Company – SapphireOne should enter the company, but if it doesn’t, enter the company manually.
- Department – Enter a department if required.
- Transaction – Choose from the extensive list of transactions when the blue arrow is selected. For every type of transaction, the user can set up individual rules as needed.
- Rules Trigger – Next, select a rule from the Rules Trigger list box to be applied. Once the selected rule is violated, the workflow function will become active and activate the Workflow function.
- Transactions – The first three rules will generate a WF error if the user tries to Create a New Transaction, or Modify or Delete a transaction.
- Above $ – This option will generate a WF error when any transaction exceeds a specified dollar amount.
- Average Cost – Any transactions below average cost will generate a WF error.
- Credit Limit and Stop – These two options will generate a WF error when the conditions are met.
- Negative stock – Any transaction that takes inventory into a negative stock level will also generate a WF error if this option is selected.
- Leave Request – If any user makes a leave request, a WF error will be displayed, alerting the HR officer.
- Tracking Notes – This will generate a WF error, used to alert the user responsible for managing tracking notes.
- Bank Details – This is linked to SapphireOne’s G/L accounts that are bank accounts.
- Floor Price – When this option is selected, a WF error will be sent to the chosen user, allowing them to approve or disapprove the sale.
Workflow Stages
- Stages – Next, set the number of hierarchical stages that must be navigated before the WF error is removed. Each stage will occupy a column in each row in the flow list. Up to 6 stages or levels of authorisation are provided, although managing 6 levels could be challenging. To simplify it, entering the number 3 here will set up three columns in the flow area below with default headings.

- Single Stage – If only a single level of approval is required, leave the Stage set at 1 for a single level of approval. The flow area below will display just one item across the entire row, as seen to the right.

- Multiple Stages – If more stages or levels are required, enter a number from 2 to 6. The additional stages will be added as extra columns in the flow area, as seen to the right.
- Notes – Any notes for this workflow rule can be entered here.
Now that we have created a rule for a transaction, we need to select how it is to be applied. In the Flow area, enter the Users or the Level of users to whom the rule will be applied.
Flow Area
- New Button – To enter in a new event the following procedure must be followed.
- Column or Stage Selection – The user must first select the column and then click the New button in the top right-hand corner of the Flow area. SapphireOne will place the word “User” in the column that was selected.
- Multiple Stages – Repeat the procedures above for each column or stage in the workflow function. From now on, once one of the stages in the line has been selected, it will change to the orange colour, as seen below.
- Column or Stage Selection – The user must first select the column and then click the New button

- Stage Selection – The user must now select each stage in sequence and set up the following details for every stage.
- Stage – SapphireOne will add a suffix of the stage number to the name “Stage”. The user may then enter a column heading name for the stage if required.
- Type – The user has 2 choices here: Approve or Notify. If “Approve” is selected, the user will have to go through the approval process before the Workflow error is removed for them. If “Notify” is selected, the user will only have to open the transaction for viewing.
- Number – The number entered here indicates the number of users that have to approve this transaction before the WF error is removed from the transaction. Zero means none, and 5 means five. Be careful here, as the default is usually not wanted, so a number will have to be manually entered.

Party Group
For each stage, this area sets up the users and the tasks they are to perform for this Workflow function.
- Type – This will determine how the workflow rule will be applied as follows.
- User – When this option is selected, a data entry field will be displayed, allowing the user to enter a selected user’s ID, linking the rule to a single chosen user. Once a user ID has been selected, SapphireOne will display the selected user’s ID.
- Level – When this option is selected, the Change button will be displayed. When it is clicked, SapphireOne will display the organisational chart, allowing the user to select an organisational level for this rule to be applied to. Once a level has been selected, SapphireOne will display the name of the level selected.
- Creator – When this option is selected, SapphireOne will allow the creator of the transaction to process the transaction.
- Authorisation Required checkbox – This checkbox is crucial in relation to the Workflow Rules function. When selected, SapphireOne will enforce the WF error for the selection made in the Link radio buttons. If it is not selected, SapphireOne will allow the user to create and save transactions as listed without a WF error as normal. However, they will also receive the active message pop-up dialogue when there are transactions within SapphireOne created by other users that meet the criteria set up in the Workflow rule.
- Selected – Restricted saving of the selected transactions with WF error.
- De-Selected – All transactions saved normally and permission to approve selected transactions.
- Hierarchical Authorisation Checkbox –If this checkbox is selected, SapphireOne will allow anyone above the level that has been entered for the stage to authorise the transaction.
- Notes – Finally, enter any notes for this workflow entry.
Dictation and Speech to Text Overview
SapphireOne’s implementation of both Dictation (MacOS) and Speech to Text (Windows) is a game changer for data entry. Any data entry field you can type into using a keyboard can use this feature.
You can also use this functionality on all inquiry screens within SapphireOne. For example, the user is in a Contact within a Client. They may have made a phone call to that particular client using the Softphone technology. Consequently, this will automatically date and time stamp both the contact and the phone number you called.
As soon as the call is completed, the user has the ability to use Speech to Text (Windows) or Dictation (MacOS). They can dictate into the memo field of the CRM contact, adding as much description as they require.
Dictation and Speech to Text Procedure
This functionality applies across every single Data Entry screen. For example, the SapphireOne user is entering a Vendor Invoice (VI). Additionally, you may want to add a memo within the Vendor Invoice (VI). The user can utilise the tool and simply dictate the memo.
Another example is if the user wants to add additional lines to the General Ledger account, within each General Ledger account. When the user is completing data entry using a General Ledger, there’s always a unique memo field for each GL account line.
The user can then utilise this feature to quickly add the information they need to add. Alternatively, you may have an interview with an employee. After the interview process is completed, the user can then make notes about the employee.
Speech to Text or Dictation is an extremely powerful tool. It is something that we at SapphireOne, as well as our clients, utilise daily. It is a massive time saver.
Checking for WF Transactions
User Work Flow Alert – For any user required to approve workflow transactions, there will be an additional button displayed at the right-hand end of the toolbar, as seen here ![]() .
.
When the user clicks this button ![]() , SapphireOne will display an alert dialogue indicating how many workflow transactions require their attention for processing.
, SapphireOne will display an alert dialogue indicating how many workflow transactions require their attention for processing.
Organisation Levels and Mixed Permissions
Note that the Organisation Levels referred to here are from the Organisation Chart function in the Controls drop-down menu.
When Organisational Levels are used when setting permissions for Workflow Rules, the Levels are not hierarchical. In the level above, a user will not have automatic authorisation permissions granted. If this were allowed, everyone above the working level would be viewing authorisation alerts, including the General Manager or CFO.
Authorisation may only be assigned at a particular level by selecting the Authorisation Required checkbox for any user or groups of users in SapphireOne.
If authorisation permission is to be set at the User Level, the users should not have the Rules Level set in their user file on the first page of a User Inquiry (Details Page). Care will also have to be exercised when Organisation levels are used with users on a user-by-user basis.
Probably the most common error when setting up this function is the creation of a conflict. For example, authorisation has been granted for Sales Managers and Authorisation Required for the user SapphireOne Sydney, who is also in the Sales Managers group. That is a direct conflict that must be avoided at all costs, as the user has been included as part of the Sales Managers level.
Do not mix permissions. Ensure that a specific user who is not allowed to authorise transactions does not also form part of any organisational level that may authorise transactions.
Workflow In Operation (Restrictions)
When a user creates a transaction and saves it, SapphireOne determines if a workflow rule should be enforced. If a rule is broken and the checkbox has been selected, SapphireOne proceeds to save the transaction with a status of “err” for error. The error code will be “WF” for Workflow, meaning that a user with appropriate authorisation must approve the transaction in order to remove the error code and enable further processing, as documented on the previous page.
From SapphireOne’s setup, there are two types of users who will require authorisation or be able to authorise transactions:
- User who initiates or creates the Transaction – The user’s ID will be recorded by SapphireOne, and they will be the only user to receive the Active Message pop-up for the transactions they create. Until a user actually creates a transaction, they will not receive any Active Message authorisation pop-ups. OR Specific Users, for example, SONE0 SapphireOne Syd, i.e., a new staff member whose transactions management wants to check before processing. They will also only receive the Active Message pop-up for the transactions they create.
- User Level – This is different, as it refers to a group of users who share the same Rules Level set in the first page of their User Access Inquiry. Once a transaction has been created by a single member of the Rules Level Group, all users in the same group will receive the Active Message pop-up. For example, if there is more than one user with a Level of Sales Manager set in their user file, they would all be presented with the Active Message pop-up.
Workflow In Operation (Approvals)
The rules for approvals follow the same logic as for restrictions, only in reverse. Some planning will be required when setting up the rules to ensure the desired outcome is achieved. If organisational chart levels are used throughout, and you have 100 sales staff and 1 sales manager set to authorise transactions, the Active Message pop-up will be displayed to all 101 users. This may not be the desired outcome, as it could lead to inefficiencies and unnecessary notifications for some users.
To prevent this issue, it is crucial to carefully plan and set up the Workflow Rules according to your organisation’s structure and requirements. You may choose to have specific users or levels to handle approvals, or you may implement a more hierarchical approach to ensure that only the necessary users are notified and involved in the approval process.
By carefully considering the organisational structure and the roles of each user in the Workflow Rules, you can create an efficient and effective approval process that meets the needs of your organisation without causing unnecessary confusion or delays in transaction processing.
Setting Up Rules
The Authorisation Required checkbox must only be selected for users who are permitted to authorise transactions.
There are three options for selecting users when setting authorisation rules, which are detailed below:
- User by User Basis: The user ID of each individual user must be entered. This option can be used in two ways: for a specific user who is authorised to approve transactions, or for a new staff member whom management wants to monitor by checking all transactions they create before further processing.
- Organisational Level Basis: This option can be used when a group of users is selected from the organisational chart. For example, all sales staff could be set up so that any transaction they create requires authorisation. However, it should be noted that this could create a problem where all sales staff are presented with an “Active Message” for every transaction created by any user in the sales staff group, which could become annoying.
- User Who Starts Transaction: This is likely the best option for setting authorisation rules. By not selecting the “Authorisation Required” checkbox, SapphireOne will require that all transactions be authorised, but only the user who created the transaction and any user with the checkbox selected will be presented with the “Active Message” popup.
Two Events per Rule
As shown below, for every rule set up, there must be a minimum of two events established. One that necessitates authorisation and one that doesn’t, as shown below. It’s not enough to have a WF error on a transaction; there must be at least one staff member who can authorise any WF transactions that are created.
Examples
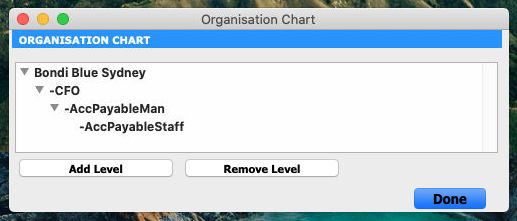
For every rule created, there must be at least two events set up: one that requires authorisation and one that does not. It is important to have at least one staff member who can approve any WF transactions that are created. From the Organisation Chart referred to above we will discuss three scenarios.
Scenario 1
- Sales Staff – Set up users performing sales or purchases in the AccPayableStaff level.
- The Authorisation Required checkbox is selected.
- Sales Managers- Set up one or more users as Sales Managers in the AccPayableMan level.
- The Authorisation Required checkbox would not be selected.
- End result – All sales staff will create transactions with a WF error requiring the Sales Manager to approve them. The Active Message alert will be displayed to the user who created the transaction and the Sales Manager. Even if another user modifies the transaction, only the user who created the transaction and the Sales Manager will receive notification messages.
Scenario 2
- User Who creates the Transaction- For the user who creates the transaction.
- The Authorisation Required checkbox is selected.
- Sales Managers- As above, set up one or more users as Sales Managers in the AccPayableMan level.
- The Authorisation Required checkbox would not be selected.
- End Result – All Sales staff will create transactions with an WF error requiring the Sales Manager to approve them all. The Active Message alert will be displayed to the user who created the transaction and the Sales Manager. Even if another user modifies the transaction the only user who receives notification messages will be the user who created the transaction and the Sales manager.
Scenario 3
- User – If necessary for any created transaction, a specifically selected user may be set up to receive notifications about all transactions with workflow errors. This Sales Staff user must not have a Level of Sales Staff set in their user file, or a conflict will arise.
- Select User from the Change button options.
- The Authorisation Required checkbox is selected.
- Sales Managers – Set up one or more users as Sales Managers in the AccPayableMan level.
- The Authorisation Required checkbox would not be selected.
- End Result – Only the Accounts Manager and the entered user will receive any alerts for Workflow.
Ensure that only one user has been granted authorisation privileges and does not belong to any other group or organisational level. If two specific users or levels have authorisation privileges, all of them will have to authorise transactions before the WF error code is released, unless they are part of an organisational level.
4D View Pro Page Overview
4D View Pro is a 4D component that includes a 4D form area and specific methods. It allows you to embed advanced spreadsheet features in your projects.
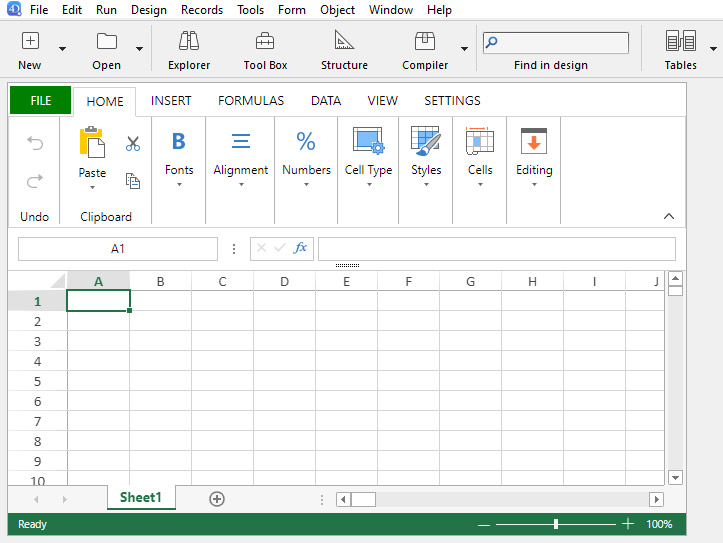
A spreadsheet is an application containing a grid of cells into, which you can enter information, execute calculations, or display pictures. 4D View Pro is powered by the SpreadJS spreadsheet solution integrated in 4D.
Embedding 4D View Pro areas in your forms allows you to import and export spreadsheets documents using the 4D View Pro commands.
Import From a SapphireOne Inquiry
The values of all cells from any SapphireOne inquiry can be imported into a 4D View Pro document with ease. The procedure is as follows.
- Open any SapphireOne Inquiry. Either standard or custom.
- Select 4D View Pro from the Sapphire Tools menu.
- Select the
 Import From Inquiry button on the bottom left corner of the 4D View Pro screen.
All inquiry screens in SapphireOne offer the option to customise the list of items displayed on the page. This feature, known as Custom Inquiry, allows you to select the data fields to be shown and the order in which the columns of data appear across the screen. Although a client list is used as an example below, any type of inquiry can be customised within SapphireOne.
The list below represents the standard inquiry list, displaying a basic set of data fields for each client record:
Swap to Custom Inquiry
When you select the ‘Swap to Custom Inquiry’ button in the lower left-hand corner of the screen, SapphireOne will display the default Custom Screen, as shown below. This Custom List screen provides the user with two main options for organising the data display:
- To add or remove the data field columns displayed on the screen, click the ‘Setup’ button in the bottom right corner of the screen. Within the Setup screen, you can right-click on the column lines and choose from Delete, Move Left, or Move Right. More information on the Setup screen is provided below.
- To change the order in which the data field columns are displayed, click the ‘Setup’ button in the bottom right corner of the screen. Within the Setup screen, you can right-click on the column lines and choose from Delete, Move Left, or Move Right. More information on the Setup screen is provided below.
Once you have customised the Custom Inquiry screen, the screen view will be unique to you, and each time you log in, you will see the same custom view. You also have the option to select and save an unlimited number of custom views. This can be done in the ‘Setup’ screen, as detailed below.
The Inquiry screen below is the initial Custom Inquiry screen, which can be modified by the user.
Custom Inquiry Screen ‘Setup’ Function
To begin setting up your Customised List screen, click the Setup button, as shown above. The Setup screen will appear, as displayed below.
From this screen, users can add and remove data columns as needed. Almost every field within the SapphireOne data tables can be included in the Custom List screen, provided the user has the necessary authorisation.
The screen features several menu items across the top, which include:
- Reset to Default – Clicking this button resets the display to the default settings determined by SapphireOne. When you add a new data field, SapphireOne will place it on the right-hand side of the data columns. You can then click on the field heading and drag it to your desired location on the screen.
- Show Related Record – This option allows you to add related fields from other tables. By ticking the Show Related checkbox
 at the top of the screen, you can select a related record, and a mini view of that related record for the chosen entry will be displayed for the currently selected record. You will need to select the fields to be displayed.
 - Favourite Set – Located at the top left of the screen, this option enables you to save a custom-created screen for future use. For instance, you can have a simple Inquiry screen for general use and a more complex screen view when auditing specific information.
For complete documentation please view the complete SapphireOne Knowledge Base 4D View Pro article.
4D Write Pro Page
4D Write Pro Page Overview
4D Write Pro offers 4D users an advanced word-processing tool, fully integrated with your 4D database. Using 4D Write Pro, you can write pre-formatted emails and/or letters containing images, a scanned signature, formatted text and placeholders for dynamic variables. You can also create invoices or reports dynamically, including formatted text and images.
The key features of the product are:
- 4D Write compatibility: a 4D Write Pro object can open and convert legacy 4D Write documents while supporting most of their specific properties.
- Word processing: a 4D Write Pro object embedded in a form provides standard word-processing features, including text and style manipulation, image insertion, import and export, and much more.
- Database integration:
- A 4D Write Pro object can display variable parts which will be filled with data from the database, or data computed by 4D.
- 4D Write Pro documents can be stored within database fields or on disk.
Working with 4D Expressions
All SapphireOne table values are easily accessible for integration into a 4D Write pro document, either verbatim or utilised within a function to be dynamically processed at export. These inserted values are referred to as 4D Write Pro Expressions. The process is as follows.
- Open any Inquiry list screen. Either standard or custom.
- From the Sapphire Tools menu, select ‘4D Write Pro’.
- A new document is initially provided. Alternately the SapphireOne user may open a pre-existing document by selecting File > Open from the SapphireOne main menu.
- Place the cursor within the document at the location you would like to insert the 4D Write Pro Expression.
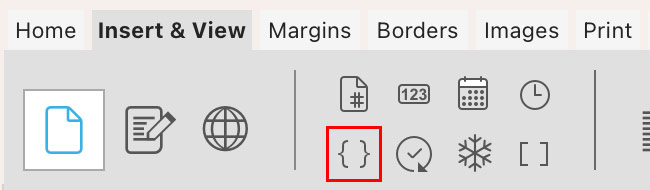
- Select the ‘Insert & View’ Tab.
- Select the ‘Insert 4D Write Pro Expression’ button ({}).
All inquiry screens in SapphireOne offer the option to customise the list of items displayed on the page. This feature, known as Custom Inquiry, allows you to select the data fields to be shown and the order in which the columns of data appear across the screen. Although a client list is used as an example below, any type of inquiry can be customised within SapphireOne.
The list below represents the standard inquiry list, displaying a basic set of data fields for each client record:
Swap to Custom Inquiry
When you select the ‘Swap to Custom Inquiry’ button in the lower left-hand corner of the screen, SapphireOne will display the default Custom Screen, as shown below. This Custom List screen provides the user with two main options for organising the data display:
- To add or remove the data field columns displayed on the screen, click the ‘Setup’ button in the bottom right corner of the screen. Within the Setup screen, you can right-click on the column lines and choose from Delete, Move Left, or Move Right. More information on the Setup screen is provided below.
- To change the order in which the data field columns are displayed, click the ‘Setup’ button in the bottom right corner of the screen. Within the Setup screen, you can right-click on the column lines and choose from Delete, Move Left, or Move Right. More information on the Setup screen is provided below.
Once you have customised the Custom Inquiry screen, the screen view will be unique to you, and each time you log in, you will see the same custom view. You also have the option to select and save an unlimited number of custom views. This can be done in the ‘Setup’ screen, as detailed below.
The Inquiry screen below is the initial Custom Inquiry screen, which can be modified by the user.
Custom Inquiry Screen ‘Setup’ Function
To begin setting up your Customised List screen, click the Setup button, as shown above. The Setup screen will appear, as displayed below.
From this screen, users can add and remove data columns as needed. Almost every field within the SapphireOne data tables can be included in the Custom List screen, provided the user has the necessary authorisation.
The screen features several menu items across the top, which include:
- Reset to Default – Clicking this button resets the display to the default settings determined by SapphireOne. When you add a new data field, SapphireOne will place it on the right-hand side of the data columns. You can then click on the field heading and drag it to your desired location on the screen.
- Show Related Record – This option allows you to add related fields from other tables. By ticking the Show Related checkbox at the top of the screen, you can select a related record, and a mini view of that related record for the chosen entry will be displayed for the currently selected record. You will need to select the fields to be displayed.
- Favourite Set – Located at the top left of the screen, this option enables you to save a custom-created screen for future use. For instance, you can have a simple Inquiry screen for general use and a more complex screen view when auditing specific information.
This will open the Formula Editor panel whereby a 4D Write Pro Expression can be prepared for placement in to your document.
Utilising the Formula Editor
The Formula editor provides many shortcuts for writing formulas. You can click field names, operators and commands, as well as any project methods, to add them to the formula. When you click on an item, it is automatically displayed in the editing area where you can then modify it using standard cut/copy/paste functions. You can also enter items directly in the editing area or drag and drop them from the list of items.
The Formula editor contains the following areas.
- List of tables and fields – This area displays the fields of the table. The menu located above the list lets you set the fields to be displayed. You can use fields of the current table, those of related tables or those of all the tables.
Note: Tables and fields with the Invisible property do not appear in the list. For more information about this property, refer to the “Attributes” section in Table properties and Field properties. - Operators list– The operators list lets you choose the operators to be used in the formula. The operators are grouped into themes found in the menu located above the list:

Each theme displays all the available operators for the corresponding type of data or operation. For example, the assignment operator := is available for all data types. For a description of each operator, refer to the following section. - Commands list – The commands list contains the 4D functions that can be used in formulas, as well as any project methods allowed by the developer. The menu located above the list lets you display the commands by theme or by alphabetical order. Refer to the 4D Language Reference manual for a description of the 4D commands that appear in this menu.
In principle, project methods that can be used in formulas must be declared beforehand using the 4D SET ALLOWED METHODS command. However, by default, the Designer and Administrator of the database have complete access to the 4D commands and user methods in the Formula editor. It is also possible to completely disable access control for all users. These options are set on the Security page of the Database settings.
Formula operators
Here is a brief description of the different operators available in the Formula editor. For a more detailed description of the possibilities provided by these operators, refer to the Undefined chapter of the 4D Language Reference manual.
- String Operators
A and B are character strings; N is a number.
OperatorUseDescription:= AssignmentA:=BAssigns the value B to A+ ConcatenationA+BReturns AB* RepetitionA*NRepeats the value of A N times[[ ]] Indexes[[A]]NReturns the Nth character of A”” Empty string””Inserts a pair of quotation marks - Numeric Operators
X and Y are numbers.
OperatorUseDescription:= AssignmentX:=YAssigns the value Y to X+ AdditionX+YReturns X plus Y- SubtractionX-YReturns X minus Y* MultiplicationX*YReturns X multiplied by Y/ DivisionX/YReturns X divided by Y\ Integer DivisionX\YReturns the integer division of X by Y (X and Y must be integers)% ModuloX%YDivides X by Y and returns the remainder^ ExponentiationX^YReturns X to the power of Y
Note: The modulo % operator returns significant values with numbers belonging to the long integer category (from -2^31 to +2^31 minus 1). To calculate the modulo of numbers outside of this interval, use the Mod command.
- Date Operators
D1 and D2 are dates; N is a number.
OperatorUseDescription:= AssignmentD1:=D2Assigns the value D2 to D1+ AdditionD1+NReturns D1 plus N days- DifferenceD1-D2 orReturns the number of days between D1 and D2D1-NReturns D1 minus N days!//! Blank date!00/00/00!Inserts a blank date - Time Operators
H1 and H2 are times; N is a number.
OperatorUseDescription:= AssignmentH1:=H2Assigns the value H2 to H1+ AdditionH1+H2 orReturns H1 plus H2H1+NReturns H1 plus N seconds, expressed in seconds elapsed since midnight- SubtractionH1-H2 orReturns H1 minus H2H1-NReturns H1 minus N seconds, expressed in seconds elapsed since midnight* MultiplicationH1*NReturns H1 multiplied by N, expressed in seconds elapsed since midnight/ DivisionH1/NReturns H1 divided by N, expressed in seconds elapsed since midnight\ Integer DivisionH1\NReturns the integer division of H1 by N, expressed in seconds elapsed since midnight% ModuloH1%NDivides H1 by N and returns the remainder?::? Blank hour?00:00:00?Inserts a blank hour - Comparison Operators
Z1 and Z2 can be of the string, numeric, date or time type.
OperatorUseDescription= EqualZ1=Z2Returns True if Z1 equals Z2# Not equalZ1#Z2Returns True if Z1 does not equal Z2> Greater thanZ1>DReturns True if Z1 is greater than Z2>= Greater than or equal toZ1>=Z2Returns True if Z1 is greater than or equal to Z2< Less thanZ1<Z2Returns True if Z1 is less than Z2<= Less than or equal toZ1<=Z2Returns True if Z1 is less than or equal to Z2 - Logical Operators
B1 and B2 must be Booleans (expressions that are TRUE or FALSE)
OperatorUseDescription& ANDB1 & B2Returns True if B1 is True and B2 is True| ORB1 | B2Returns True if B1 is True or B2 is True
For complete documentation please view the complete SapphireOne Knowledge Base 4D Write Pro article.
You can review our Blog and YouTube channel for additional information and resources on SapphireOne ERP, CRM and Business Accounting software.